Badger's Workshop

V8Druid

V8Druid

do it as well as you can,but learn to do it better
Yup the suds pump was lying on the floor with what looked like several questionable attempts at welding it back to the frame attatched to it.
When I start to get it running I'm sure you'll hear back from me about the electric suds.

You say bi metal only good for big solid, I'll have the odd solid thing to do, will hss be alright with that?
I've never even used a horizontal bandsaw before lol a big learning curve coming up
sorry should've said Hi-carbons ....not bi-metal (senior moment) .... HSS M42 only ... very little saving on soft backs and just don't last .... plus they run out in the cut, far easier
https://selmach.com/product/goldcut-424/
here's a rough-ish view of the lift point ..
WP_20180713_11_42_31_Pro.jpg


and what the pump should look like ... will get you some better shots

WP_20180712_18_28_22_Pro.jpg


found a really cheap source for the drive belts for the pump ... if it'll go back on easy enough ... also whip it apart and clean the vanes out so's they're free ... gum up with crap usually and check the springs're OK ... got a source for them too ;) ........ OE spares are available .. at an eye watering price .. these were not cheap new
 
honey_badger

honey_badger

Well-known member
sorry should've said Hi-carbons ....not bi-metal (senior moment) .... HSS M42 only ... very little saving on soft backs and just don't last .... plus they run out in the cut, far easier
https://selmach.com/product/goldcut-424/
here's a rough-ish view of the lift point ..
View attachment 16383

and what the pump should look like ... will get you some better shots

View attachment 16384

found a really cheap source for the drive belts for the pump ... if it'll go back on easy enough ... also whip it apart and clean the vanes out so's they're free ... gum up with crap usually and check the springs're OK ... got a source for them too ;) ........ OE spares are available .. at an eye watering price .. these were not cheap new
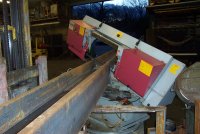
That is ideal, however someones welded some RSJ on the bottom of mine so can just stick forks straight under it :rolleyes: :ROFLMAO:
 
honey_badger

honey_badger

Well-known member
1593902685458.png

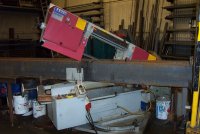
Got it in the shed and started cleaning it up a bit
1593902741447.png

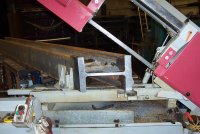
No space in the workshop at the mo so will have to live here until I can get a bit more space freed up.

1593902783877.png

1593902939078.png

Checked out the cup drive, bit rusty but we'll see how it runs before passing judgement I think. Bit of a chip in the female one on the outside, hopefully that doesn't cause any grief.

Got the motor off, sliders were stiff as owt but not quite sized.

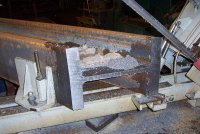
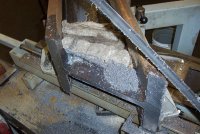
Examining the mount for this pump, thinking might just make a mount instead of trying to weld it back up, I'd say shes done her service :ROFLMAO:
Plus a few have had a go at it by the looks of things....
1593903070322.png
1593903118423.png

1593903052505.png


And thats where I got to this evening, will take some photos of the cleaned up saw soon, hoping to get a motor on there before long and she should be running.
The blade that came on it looks allright, a bit of surface rust. Seeing as I imagine that I'll destroy a few blades while I'm learning, any good ideas to clean the worst of the rust off without ruining the blade?
 
V8Druid

V8Druid

do it as well as you can,but learn to do it better
View attachment 16435
Got it in the shed and started cleaning it up a bit
View attachment 16436
No space in the workshop at the mo so will have to live here until I can get a bit more space freed up.

View attachment 16437
View attachment 16438
Checked out the cup drive, bit rusty but we'll see how it runs before passing judgement I think. Bit of a chip in the female one on the outside, hopefully that doesn't cause any grief.

Got the motor off, sliders were stiff as owt but not quite sized.

Examining the mount for this pump, thinking might just make a mount instead of trying to weld it back up, I'd say shes done her service :ROFLMAO:
Plus a few have had a go at it by the looks of things....
View attachment 16440View attachment 16441
View attachment 16439

And thats where I got to this evening, will take some photos of the cleaned up saw soon, hoping to get a motor on there before long and she should be running.
The blade that came on it looks allright, a bit of surface rust. Seeing as I imagine that I'll destroy a few blades while I'm learning, any good ideas to clean the worst of the rust off without ruining the blade?
what's wrong with the motor on it?
run it with a wire brush on it to clean it a bit, but a few cuts'll have it shining again
Suds pump bracket is std damage to them ..... very weak point with them .. too flimsy and far too exposed:(
cup drive should be OK as is
front band wheel tension sliders are prone to seizure ... don't get moved often ... unless you'm heavy on the blades and I'd strip and clean the blade pressure control cylinder as they never get done and always give grief when you buy one s/hand

Oh and beware the big Zeberdee hiding in the base which provides the counterbalance lift for the bow frame ... adjuster is at the front, under the vise wheel
 
V8Druid

V8Druid

do it as well as you can,but learn to do it better
That is ideal, however someones welded some RSJ on the bottom of mine so can just stick forks straight under it :rolleyes: :ROFLMAO:
that's cheating ... thought you were collecting it in the back of yer van ........ with those bits under it ... beware, when the bow is fully up, they're incredibly arse heavy and will go over back'ards, if not careful/too enthusiastic lifting the bow :oops:
 
honey_badger

honey_badger

Well-known member
what's wrong with the motor on it?
run it with a wire brush on it to clean it a bit, but a few cuts'll have it shining again
Suds pump bracket is std damage to them ..... very weak point with them .. too flimsy and far too exposed:(
cup drive should be OK as is
front band wheel tension sliders are prone to seizure ... don't get moved often ... unless you'm heavy on the blades and I'd strip and clean the blade pressure control cylinder as they never get done and always give grief when you buy one s/hand

Oh and beware the big Zeberdee hiding in the base which provides the counterbalance lift for the bow frame ... adjuster is at the front, under the vise wheel
Yeah that bracket doesn't seem like the best design.
My tension slider on the front seems to run pretty good both ways, not too worried about that at the mo.
Yeah it sounds a little rough on the way down, was going to at least change the oil but might as well strip it and clean it.

The motor is 3 phase so I'll either pop a single phase motor on there or i'll get a VFD and run it off that, sure which yet.
I saw that, thought I really wouldn't want to have to fight with him.
 
honey_badger

honey_badger

Well-known member
that's cheating ... thought you were collecting it in the back of yer van ........ with those bits under it ... beware, when the bow is fully up, they're incredibly arse heavy and will go over back'ards, if not careful/too enthusiastic lifting the bow :oops:
I'll remember that, maybe pop a screw under it or add a bit of extra weight to the front one
Well the original plan was to take the van and put it in there, but when I had to go down for a second time I just took the trailer seeing as I'd been once and there was space for it down there
 
honey_badger

honey_badger

Well-known member
Fixed the mount on the suds pump this morning
1593981374661.png


The adjuster for this ol spring is a bit siezed, will have to sort that out soon.
On the pannel it says I should adjust this for different cutting pressures, and shows a gauge on the right hand side of the machine which shows the numbers for adjustments, however there is no sign of this gauge on my machine...?

1593981390439.png
 
V8Druid

V8Druid

do it as well as you can,but learn to do it better
Fixed the mount on the suds pump this morning
View attachment 16461

The adjuster for this ol spring is a bit siezed, will have to sort that out soon.
On the pannel it says I should adjust this for different cutting pressures, and shows a gauge on the right hand side of the machine which shows the numbers for adjustments, however there is no sign of this gauge on my machine...?

View attachment 16462
neat pump mount boyo ..... trying to recall where the pointer is for the blade pressure/spring tension -- but damned if I can ... may just have been the real early ones .. can deffo remember a pointer on one side of one i had
can't see any on the net showing it though

spares suppliers (at a price) https://www.machinespares.net/products/startrite/metal/horizontal-bandsaws/meba-sm250320/
 
honey_badger

honey_badger

Well-known member
neat pump mount boyo ..... trying to recall where the pointer is for the blade pressure/spring tension -- but damned if I can ... may just have been the real early ones .. can deffo remember a pointer on one side of one i had
can't see any on the net showing it though

spares suppliers (at a price) https://www.machinespares.net/products/startrite/metal/horizontal-bandsaws/meba-sm250320/
Cheers, tried to do it in a way that avoided having to weld to the casting as not to make a real mess of things
Ah, I won't fret about it much, I'll free up the screw and set it back where it was, assuming someones got it right at somepoint :ROFLMAO:
Those spares will be handy, hopefully not too handy though :ROFLMAO: They sure aren't cheap
 
honey_badger

honey_badger

Well-known member
Is it supposed to cut away from the fixed jaw on the vice? Seems a bit bizzare to me...
 
V8Druid

V8Druid

do it as well as you can,but learn to do it better
Is it supposed to cut away from the fixed jaw on the vice? Seems a bit bizzare to me...
correct ... there's a rotational arrow somewhere ... think it's on the blade wheels IIRC .... it'd drag al the swarf and crap into the back wheel otherwise .... carries enough around the bow as it is ..... my Bauer used to have a blade wiper/wire cleaning brush on the forward guide to rid the blade of 95% of crap as it passed and ran in the same direction as the Mebas do ... these are a 250 model, BTW .. the 320 is a big and rare beast ... my Bauer was a 380 IIRC (will mitre cut a 250/320/380 mm section or round )

Picture_0128.JPG

Meba 250 in the background to the right ;)

and this was a Noble and Lund 39" blade cold saw .... could used to pick 'em up for scrap money ... for square cutting big stuff they were awesome tools
Picture_0122.JPG

but the segmented blades were serious bucks:oops::censored: ... at 8 ton it never hopped about and with a 4t pressure hydra clamp, took no prisoners
 
honey_badger

honey_badger

Well-known member
Some tools that pair, bet you didn't run into stuff you couldn't cut very often...

A mate had a motor lying around that is powerful enough and at the right RPM, however one of the mounts is broken...I'd fix it if it was going to be anywhere close to the right mount for the meba, but its miles off.
Spent the evening trying to make my own, no luck with a design yet though. The physical size of this motor is a bit larger, so they have to be very squat mounts which is proving a real challenge.
1594072015143.png
 
V8Druid

V8Druid

do it as well as you can,but learn to do it better
Some tools that pair, bet you didn't run into stuff you couldn't cut very often...

no ... could cope with most things ...
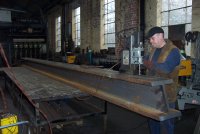
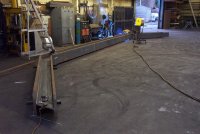
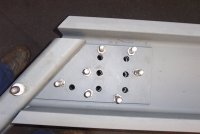
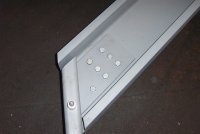
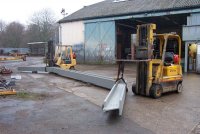
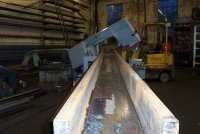
this was the dearest piece of steel I ever bought ... 16m and 6 ton ... well over three grands-worth ...
much measuring done before setting the Bauer at it .. job for me ;):unsure: ... no fook ups required :oops:

DCP_3750.JPG DCP_3749.JPG DCP_3747.JPG DCP_3756.JPG DCP_3758.JPG DCP_3759.JPG DCP_3762.JPG DCP_3783.JPG


PAN 2.JPG


DCP_3773.JPG DCP_3778.JPG DCP_3813.JPG DCP_3809.JPG DCP_3828.JPG

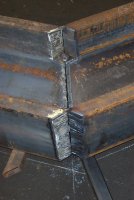
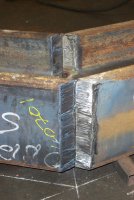
cranked rafter ...... for a timber framed building's attic roomed roof ...... architect ****ed up and forgot to put any load bearing walls in the centre of the building :rolleyes: :oops:
'twere a lump
 
Last edited:
V8Druid

V8Druid

do it as well as you can,but learn to do it better
Some tools that pair, bet you didn't run into stuff you couldn't cut very often...

A mate had a motor lying around that is powerful enough and at the right RPM, however one of the mounts is broken...I'd fix it if it was going to be anywhere close to the right mount for the meba, but its miles off.
Spent the evening trying to make my own, no luck with a design yet though. The physical size of this motor is a bit larger, so they have to be very squat mounts which is proving a real challenge.
View attachment 16477
I'd buy an inverter and broaden your spectrum of available m/c tools for the future ... single phase gear is hard to find and carries big premiums
 
V8Druid

V8Druid

do it as well as you can,but learn to do it better
PAN 3.JPG


apparently when it got to site, the crane driver took one look at it and said ...... "You're gonna wanna bigger ****ing crane than what i'm driving for that !!" :ROFLMAO::ROFLMAO:

the rest of the roof
PB091947.JPG
 
Last edited:
F

fred

Well-known member
unusual for cranked steels to be in all in one makes on site install hard. All the ones we have done were bolted together so could be lifted in sections.

Looks completely OTT specced by the struct eng as well. What was on top of the roof another 3 houses !!??
 
V8Druid

V8Druid

do it as well as you can,but learn to do it better
unusual for cranked steels to be in all in one makes on site install hard. All the ones we have done were bolted together so could be lifted in sections.

Looks completely OTT specced by the struct eng as well. What was on top of the roof another 3 houses !!??
yeh well you know what the buggers are like ..... eliminate all possibility of ever having to use your liability indemnity cover ... they ain't paying for the steel

and yeh most crankers were assemblies off a centre-ish load bearing wall on these sorts of jobs ... but as said... there weren't one to assemble off ..hence the monster ... took days to weld up !! .... and a lot of wire

another example of an attic roof's steel work .... always a crane on site, so complete assemblies were often used ... have to remember that this lot were getting erected by chippies too ...... on the odd occasion that it went out as 'Meccano', we usually ended up getting called to site to sort out the chippies **** ups and assemble it properly

PAN.JPG


got dragged all the way to bloody Leeds once ... all because the chippies had no ****ing idea how to assemble several sets of load bearing 'goal post' frames ..... holding up a four storey hotel block ..... carrot wedges, sledge and a nut whizzer ... job sorted in 90 minutes .... if they'd put all the bolts in in the first place, there'd have been no problems. No gear and even less idea :rolleyes::cry:🤬
 
honey_badger

honey_badger

Well-known member
Looks like was a nice bit of steelwork with that, fair old couple peices of steel
 
Top