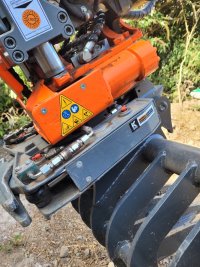
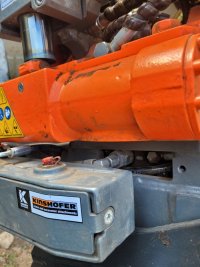
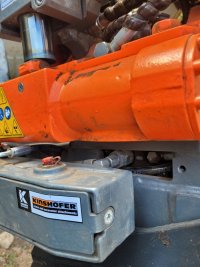
Kinshofer tr 025

M

Maxus

Well-known member
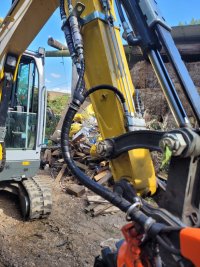
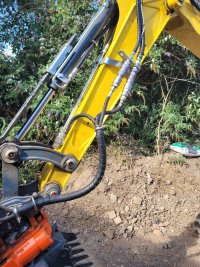
I can't understand why they routed the hitch lines through the h link, I thought it would be neater and there be less fouling if the lines were routed this way: 20260720_165012.jpg

Very satisfying job organising hydraulic lines - if I've done something daft, tell me!
 
Last edited:
V8Druid

V8Druid

do it as well as you can,but learn to do it better
only risk is a fully crowded bucket full of rough rocks/stone - as Aiden says .. looks good and way better than the original
 
Will_c

Will_c

Well-known member
In my small walker the joystick buttons were all in use, so stuck a row of extra buttons to the side (see picture). Tried momentary buttons, but ended up with on/off. Just encased in heat shrink (not shrunken over the actual buttons) for protection and wire run down the outside and into the boot. Wasn't the best looking, but worked well.
View attachment 83135
Currently working on something similar to add an extra button to the joystick without making any modifications to the original controls.
There's not much point having to take your hand off the joystick every time you want to switch between the tilt and gripper functions, so mounting a selector on the side console isn't really an option.

I have 3D-printed test bracket that clamps around the 38 × 3 mm square section on the underside of the joystick. It uses a small microswitch that's actuated by a simple lever with a spring to return it position, allowing you to switch functions while still operating the joystick.

It mounts in a position that's easy to reach but doesn't seem to interfere with normal machine operation, making it an easy solution with no permanent modifications as it can just be bolted on.
IMG_8408.jpeg


IMG_8404.jpeg
 
B

Brendan

Well-known member
Would it be easier to just change the joystick to one with extra buttons
 
Will_c

Will_c

Well-known member
Would it be easier to just change the joystick to one with extra buttons
New joysticks with additional buttons are very expensive, so this is a low-cost solution for the time being. It cost around £5 for the microswitch, plus a little bit of time to make the housing.

I've since upgraded the original 3D-printed bracket to an aluminium version. It's probably a bit overkill, but it works really well and has completely eliminated the flex in the lever.Just need to wire it in now.
IMG_8409.jpeg
IMG_8411.jpeg
 
M

Monkeybusiness

Well-known member
New joysticks with additional buttons are very expensive, so this is a low-cost solution for the time being. It cost around £5 for the microswitch, plus a little bit of time to make the housing.

I've since upgraded the original 3D-printed bracket to an aluminium version. It's probably a bit overkill, but it works really well and has completely eliminated the flex in the lever.Just need to wire it in now.
View attachment 83588View attachment 83589
Do you not have a spare ‘trigger’ button on the other joystick (or if not at least a blanking plug where you could retro-fit one)?
Amazing looking creation though, good skills!
 
V8Druid

V8Druid

do it as well as you can,but learn to do it better
for the cost of producing that switch mount you could probably have bought a pair of new stick tops .. nice job, but if your time was costed:rolleyes:
plenty of all sorts of stick tops on ebay
 
Will_c

Will_c

Well-known member
for the cost of producing that switch mount you could probably have bought a pair of new stick tops .. nice job, but if your time was costed:rolleyes:
plenty of all sorts of stick tops on ebay
You're probably right! . Not the most commercially viable solution, but it was a good excuse to practise machining tabbed parts to reduce setups, and it leaves the original joystick unmodified
 
V8Druid

V8Druid

do it as well as you can,but learn to do it better
Can we all stop and appreciate the hypocrisy of this 🤣
but I'm retired Rory and what I do is a hobby/time filler between all the other tish I have to do, which I 'enjoy' and keeps my hand in and my mind active
'me laddo' is in college so also has 'free time' to indulge his 'hobby' ..... real world - no way
 
V8Druid

V8Druid

do it as well as you can,but learn to do it better
some one else who has used an FLT rotator set up to create with .. 300 x 200 x 50 pins .. but his has an external drive to the ring gear hence the guarding to the motor...
still has the FLT carriage pick up hooks on the face plate
assume manual hitch as can't see any through plumbing in the centre
1785238584669.png
 
M

Maxus

Well-known member
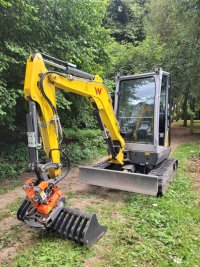
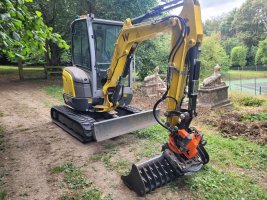
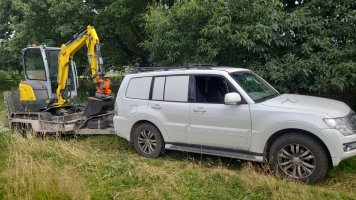
Got to put the EZ26 and TR025 through its paces this week. I'm rubbish with photos, but I've got a few here I took.

Tilt and rotate is a game changer, I've really enjoyed getting to grips with it. 30° tilt is limiting, but it's OK - 50° on the bigger models must be heaven.

I decided to take out the roller on the joystick and flip it round to get the tilt operating such that tilting left is achieved by tilting the rocker switch left - my head could get to grips with it the other way round!

The rake worked well, albeit bloody heavy! It's got to be iro 175kg. It was more or less lifting a track at full reach over the side! Grading accurately in this circumstance was difficult, the machine is a bit 'noddy' when reaching and operating on a slope with so much weight on.

The 1m scandi bucket thankfully is much lighter, and the bucket full of gravel at full reach over the side was not tipping the machine, but I was on level ground, and any more weight it would be.

The EZ26 has really clever hydraulics, I can be using several functions and the flow is shared nice and evenly, albeit slower. It's very fast, smooth and intuitive running a tiltrotator.

Zero tail is definitely a big compromise, and I'd not want anything heavier on the end, that being said I think it handles it well enough for what I'm doing. If you were consistently handling large boulders or tree trunks then maybe it would too much of a compromise - especially if not typically working in confined spaces.

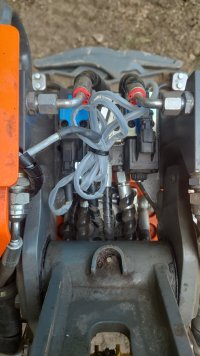
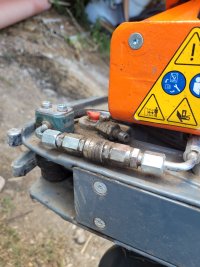
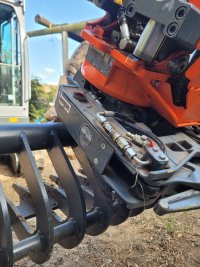
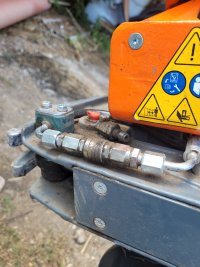
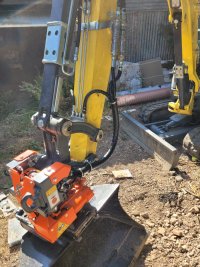
The gripper is great, but it does mean the intermecato grab and auger is going to be tricky to run as gripper is taking up the aux on the tilt rotator. The pipes that run the gripper can be disconnected to run another attachment, but they are tiny... I don't know if it's feasible to use these connections.

I can't wait to the next job I have for it!

 

Attachments

  • IMG-20260729-WA0000.jpeg
    IMG-20260729-WA0000.jpeg
    142.1 KB · Views: 30
  • 20260730_152352.jpg
    20260730_152352.jpg
    391.2 KB · Views: 37
  • 20260730_152344.jpg
    20260730_152344.jpg
    388.7 KB · Views: 33
  • IMG-20260730-WA0000.jpeg
    IMG-20260730-WA0000.jpeg
    266.8 KB · Views: 34
  • 20260731_172307.jpg
    20260731_172307.jpg
    279.8 KB · Views: 32
  • 20260731_172313.jpg
    20260731_172313.jpg
    177.4 KB · Views: 32
  • 20260731_172317.jpg
    20260731_172317.jpg
    193.3 KB · Views: 28
  • 20260731_172328.jpg
    20260731_172328.jpg
    275.5 KB · Views: 27
  • 20260731_172324.jpg
    20260731_172324.jpg
    397.8 KB · Views: 28
  • 20260731_172335.jpg
    20260731_172335.jpg
    232.5 KB · Views: 28
Last edited:
Grahams

Grahams

Don't complain - suggest what's better
The rake worked well, albeit bloody heavy! It's got to be iro 175kg. It was more or less lifting a track at full reach over the side! Grading accurately in this circumstance was difficult, the machine is a bit 'noddy' when reaching and operating on a slope with so much weight on.

The gripper is great, but it does mean the intermecato grab and auger is going to be tricky to run as gripper is taking up the aux on the tilt rotator. The pipes that run the gripper can be disconnected to run another attachment, but they are tiny... I don't know if it's feasible to use these connections.
I had a straight rake like picture below which saved a lot of weight when I didn't want to riddle stuff with a rake bucket. For grading it was perfect.
The pipes through my engcon were too small to run the attachments I wanted underneath so had a diverter plumbed into the rotate side of the main circuit with a switch on the joystick to swap back and forward as required. Only got 180 degree rotation either way on the attachment because of the pipes, but solved the problem.
Screenshot 2026-08-02 at 08.05.58.png
 
M

Maxus

Well-known member
I had a straight rake like picture below which saved a lot of weight when I didn't want to riddle stuff with a rake bucket. For grading it was perfect.
The pipes through my engcon were too small to run the attachments I wanted underneath so had a diverter plumbed into the rotate side of the main circuit with a switch on the joystick to swap back and forward as required. Only got 180 degree rotation either way on the attachment because of the pipes, but solved the problem.
View attachment 83827

Good suggestion re rake, i did have some regret not going for a scandi style, it looks like they double up as a very basic grading beam, and I dare say significantly lighter. But, no chance of riddling, or picking up material to load a dumper/trailer.

The frustration with running attachments under tilty is that the flow through the tr025 is 30 LPM so if I can figure out a way of plumbing it in (a big if) then they can theoretically run. If not, a diverter valve on one of the main circuits.

20260731_172317.jpg

There's reducer on the aux out to run the gripper, then tiny pipes..... I wonder, why did they reduce the pipes on the gripper to that extent? Would having larger pipes be too much for the gripper??
 

Attachments

  • 20260731_172313.jpg
    20260731_172313.jpg
    177.4 KB · Views: 13
Lancs Lad

Lancs Lad

Well-known member
Got to put the EZ26 and TR025 through its paces this week. I'm rubbish with photos, but I've got a few here I took.

Tilt and rotate is a game changer, I've really enjoyed getting to grips with it. 30° tilt is limiting, but it's OK - 50° on the bigger models must be heaven.

I decided to take out the roller on the joystick and flip it round to get the tilt operating such that tilting left is achieved by tilting the rocker switch left - my head could get to grips with it the other way round!

The rake worked well, albeit bloody heavy! It's got to be iro 175kg. It was more or less lifting a track at full reach over the side! Grading accurately in this circumstance was difficult, the machine is a bit 'noddy' when reaching and operating on a slope with so much weight on.

The 1m scandi bucket thankfully is much lighter, and the bucket full of gravel at full reach over the side was not tipping the machine, but I was on level ground, and any more weight it would be.

The EZ26 has really clever hydraulics, I can be using several functions and the flow is shared nice and evenly, albeit slower. It's very fast, smooth and intuitive running a tiltrotator.

Zero tail is definitely a big compromise, and I'd not want anything heavier on the end, that being said I think it handles it well enough for what I'm doing. If you were consistently handling large boulders or tree trunks then maybe it would too much of a compromise - especially if not typically working in confined spaces.

The gripper is great, but it does mean the intermecato grab and auger is going to be tricky to run as gripper is taking up the aux on the tilt rotator. The pipes that run the gripper can be disconnected to run another attachment, but they are tiny... I don't know if it's feasible to use these connections.

I can't wait to the next job I have for it!
Lovely looking setup ,nice👌🏻
 
Top