create your own Att.s, etc. ... tales from the Druid's workbench

Bri963

Bri963

Well-known member
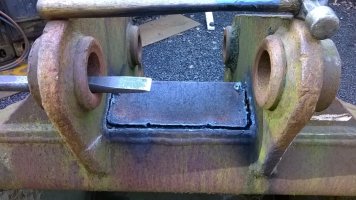
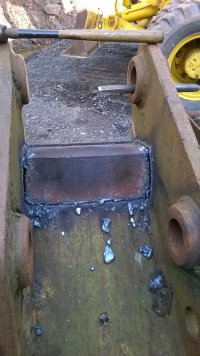
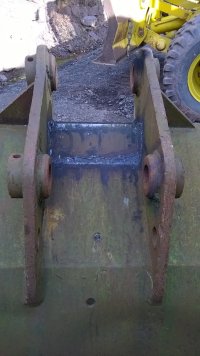
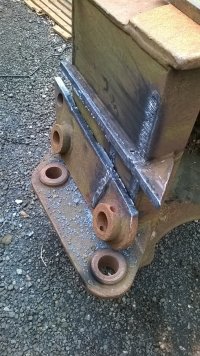
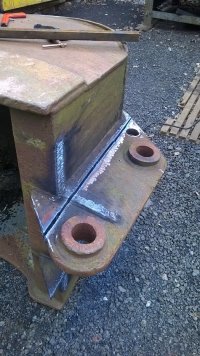
after researching the 'net for what a B20 hitch ought to look like --- first off was create some 'hooks'
View attachment 55659 View attachment 55660
and a 'latch plate' to attach 'em to
View attachment 55661
View attachment 55662

I'd found some Ying Tong seller flogging these and thought for the price (circa a tenner, IIRC) I'd give one a try - 70mm TCT hole saws
View attachment 55663
worked alright too as long as you took it slow and kept them clear of swarf ...
View attachment 55664
produced some very respectable 70 mil holes
View attachment 55665
until the inevitable happened .. but a 20mm Jacobs dealt with the problem
View attachment 55667 View attachment 55668
and I was back in biz ....

View attachment 55669

got a pair created and tried 'em out for a fit .....
View attachment 55670
I'd bought some 90mm CDS tube for bosses, that'd sposed to have arrived with a 70mm bore/10mm wall, but'd arrived at 69mm bore :mad: and not having a lathe at the time I had to get creative in opening them out, so having lopped off some 20mm bits and attached 'em to the cheek plates, I could open them up with the hole saw .. a side at a time
View attachment 55671

View attachment 55672
'til I'd gotten 'em all sorted .. slow, but workable
View attachment 55676
At the risk of teaching great grandad to suck eggs, Iโ€™ve hole-sawed up to 35 mm plate with bog-ordinary starret hole saws, and my technique is mark it with the saw, then drill a series of 10-12 mm holes round the inside and flood the saw with oil. Gives the swarf somewhere to go and speeds up the cut quite considerably.

Also, can you break these posts up a bit, just to make it easier for us to criticise?:)
 
V8Druid

V8Druid

do it as well as you can,but learn to do it better
At the risk of teaching great grandad to suck eggs, Iโ€™ve hole-sawed up to 35 mm plate with bog-ordinary starret hole saws, and my technique is mark it with the saw, then drill a series of 10-12 mm holes round the inside and flood the saw with oil. Gives the swarf somewhere to go and speeds up the cut quite considerably.

Also, can you break these posts up a bit, just to make it easier for us to criticise?:)
cool idea Bri .... that was the issue with that 70mm .... a very small curf and nowhere for the swarf to escape ... made for a VERY slow hole ... although I still have the TCT saw I've since acquired a 70mm TCT broach, which flies through :giggle: ... especially with the Ajax turret powering it

plus you get some nice re-usable slugs, with just the saw / broach

as for the request -- LOL :ROFLMAO: ... Happy New Year to you mate
trouble with splitting 'em is once I find the pix, I'm then trying to maintain a continuity .... some of 'em are months apart :rolleyes::oops:
I can try and split 'em down a bit .... not sure what'll be up next .. a few of 'em are 'well documented' - pix-wise ;):giggle:
 
V8Druid

V8Druid

do it as well as you can,but learn to do it better
so what's next ??????
I originally quickly knocked up a beam for the back end of JakieB from a lump I had sat in my yard
1704152844522.png

and having acquired the 'Drema, wanted to use it on there for spreading some planings about ... had other plans for it ultimately, so came up with a 'quick fix' for some 'pro tem' usage ;)
WP_20150206_14_25_24_Pro.jpg

so lopped the cheeks off that'd been cobbled for the Jake and set about attaching summat a bit bigger
WP_20150207_14_26_36_Pro.jpg
WP_20150207_14_29_59_Pro.jpg

with a few bolts to keep it put
WP_20150207_16_33_38_Pro.jpg

the eagle eyed'll have spotted the 17mil holes in previous posts on the b20 adaptor - and now you know what they were for ....
it worked a treat and got me a usable beam to speed up some spreading about
WP_20150207_16_51_09_Pro.jpg

the red/pinky bit in the background played quite a role in some up and coming bits an' bobs ........ another cheap ebay acquisition, delivered by our own forum transport dept. :giggle:(y)

short enough @Bri963 ;):):giggle:(y)
 
V8Druid

V8Druid

do it as well as you can,but learn to do it better
so what's next ?????? .........
..... another cheap ebay acquisition, delivered by our own forum transport dept. :giggle:(y)
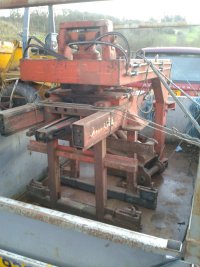
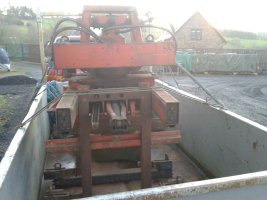
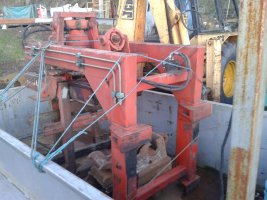
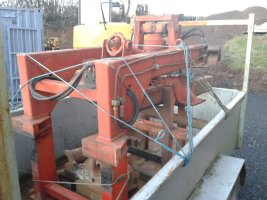
well when I say delivered ... I met Paul in a lay by down the road for a trans-ship into me trailer - as would become a bit of a norm, as he can't get ALL of his truck in here - just the front half :rolleyes::giggle: ...
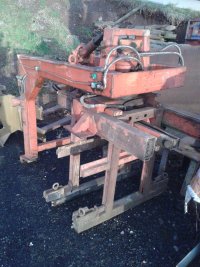
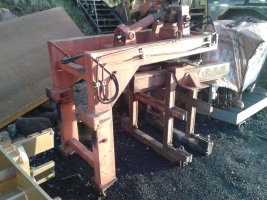
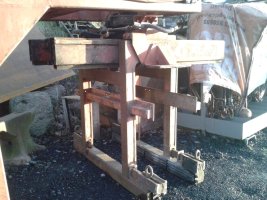
he'd picked this up for me 'en route' elsewhere and made a small diversion to meet me with this 'bit of a lump' :rolleyes: ...
again ..
tranny cost more than I paid for said 'lump' :ROFLMAO: ....
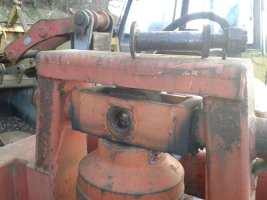
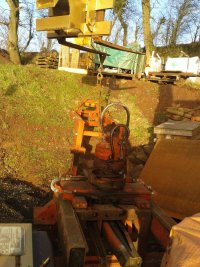
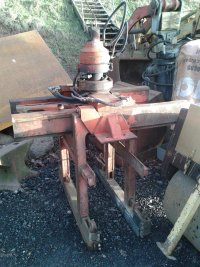
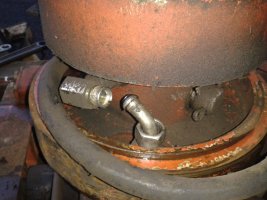
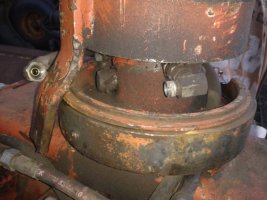
but was a nice pile of 'goodies' aside from the Steinweg brick/block grab, it came with a rotator and 6 x 2 diverter, plus a pile of 'useful' carrier framework :giggle: and loads of useful fittings/bits an' bobs :cool:
2015-01-06 16.14.13.jpg 2015-01-06 16.15.16.jpg 2015-01-06 16.16.06.jpg 2015-01-06 16.14.46.jpg 2015-01-08 15.31.20.jpg 2015-01-08 15.33.41.jpg 2015-01-08 15.34.22.jpg
next up was a bit of a dis-assembly job

2015-01-24 14.52.52.jpg 2015-01-24 15.37.30.jpg 2015-01-24 15.37.41.jpg 2015-01-24 16.39.58.jpg 2015-01-24 16.39.49.jpg 2015-01-24 16.52.02.jpg 2015-01-24 16.52.19.jpg IIRC I gave a hundred quid for the whole thing and a bit more than that to Mog for the tranny
 
V8Druid

V8Druid

do it as well as you can,but learn to do it better
but what ????? .............
wanted to retain the ability to pin the rotator back on ... and attach otherwise
WP_20150218_14_45_47_Pro.jpg

WP_20150218_14_45_27_Pro.jpg

stitched in place and a a few gussets inserted
WP_20150218_15_48_03_Pro.jpg

flipped to consolidate the underside
WP_20150218_16_07_27_Pro.jpg

and no ------- didn't borrow Rory's camera for this one :giggle: ... poor light at a guess or a bit of hand shake
WP_20150218_17_14_31_Pro.jpg

and fully consolidated for a bit of fettling
WP_20150218_17_44_26_Pro.jpg


next up --- a.n.other sun dial :giggle::giggle:
WP_20150219_17_25_37_Pro.jpg

WP_20150220_12_54_25_Pro.jpg
 
V8Druid

V8Druid

do it as well as you can,but learn to do it better
and here's what the gas axe was out for .... the dozen holes gave me multiple orientation options
WP_20150220_13_37_02_Pro.jpg

then it was 'stick time' ... few tacks ..
WP_20150220_14_13_58_Pro.jpg

and some braces
WP_20150220_14_32_44_Pro.jpg

then nail it together time
WP_20150220_15_18_35_Pro.jpg

few trial fits .......
WP_20150220_16_31_09_Pro.jpg

WP_20150221_17_20_42_Pro.jpg

and some 'shiny'/not so 'shiny' ..... ... also took some scallops out for Aux QC plumbing under the VA-r
WP_20150304_17_36_07_Pro.jpg

WP_20150304_16_43_09_Pro.jpg

then a few more bits to do .....
went down me mate's place down the road, to use his bandsaw (hadn't bought my Meba at this point)
WP_20150305_13_12_26_Pro.jpg

and lopped a few blanks .........
WP_20150305_15_19_16_Pro.jpg

opened 'em up again using the previously tried method with the hole saw, using an existing hole as a guide ... as said - slow but successful
WP_20150306_12_07_14_Pro.jpg
WP_20150306_13_38_56_Pro.jpg

a few additional holes in the beam whilst I had the mag drill out
WP_20150306_16_39_07_Pro.jpg


then dropped it on the Steinweg :)
WP_20150306_16_54_04_Pro.jpg

ready for the next part of the operation :rolleyes:;)
 
V8Druid

V8Druid

do it as well as you can,but learn to do it better
some of you may know/recall that as the 'Drema spent its life in waterworks, 'fore I owned her, she runs Fuchs Plantohyd 46 Bio-oil ...
consequently, anything I buy with a 'hydraulic history' needs purging, 'fore getting connected to the 'Drema ...
apparently the contamination limit is 1% and as the 'Drema carries 180L in the tank and probably another 50-70L in the system it doesn't take a lot to account for 1% contamination:oops:

so everything gets blown out with 150psi in all directions, several times, 'til I'm not collecting any more in catch bottles/buckets ....
WP_20150310_12_30_32_Pro.jpg
WP_20150310_12_30_53_Pro.jpg

at which point I consider it as safe as it'll get to introduce said att. to the system
WP_20150310_15_05_17_Pro.jpg

and give it some oil for a test drive
WP_20150313_16_33_44_Pro.jpg
WP_20150313_16_33_55_Pro.jpg
WP_20150313_16_34_01_Pro.jpg

this 'un functioned just fine ..... and has quite a grip
WP_20150313_16_35_10_Pro.jpg
WP_20150313_16_35_24_Pro.jpg

picks up packs of 9" hollows sweet as a nut :)(y)
 
V8Druid

V8Druid

do it as well as you can,but learn to do it better
next up ......
my favourite Geith bucket ......
bought from a guy reasonably locally ....
had a very similar disease to mine, when I got chatting with him - also bought my ped. roller off him - sadly died a few years ago - we kept in touch ...
he had a small plant yard in Aberdare.
arrived with 55mm pins but centres too short to open up to 70s and cheeks too narrow by 10mm :( so needed some major mod.s... a nice bucket though
so ....
set about it with the gas axe
WP_20150326_15_36_54_Pro.jpg WP_20150326_15_37_06_Pro.jpg WP_20150326_15_43_48_Pro.jpg WP_20150326_16_13_36_Pro.jpg WP_20150326_16_14_01_Pro.jpg WP_20150326_16_26_40_Pro.jpg WP_20150326_16_26_49_Pro.jpg
WP_20150326_17_16_54_Pro.jpg
WP_20150326_18_07_53_Pro.jpg

and having de-cheeked it ....
it got a new set
WP_20150327_16_46_56_Pro.jpg

WP_20150327_16_47_01_Pro.jpg

WP_20150327_16_47_29_Pro.jpg

Mr Ying Tong's hole saw still doing sterling service
WP_20150327_17_40_35_Pro.jpg
WP_20150327_17_40_44_Pro.jpg

but starting to show a few signs of 'use' ... holes weren't as 'clean' as they were and it'd lost the odd tooth
 
Last edited:
V8Druid

V8Druid

do it as well as you can,but learn to do it better
and then it started giving grief in the 'drive' dept. ..
didn't want to wreck the Jacobs, so an alternate got devised ...
and welded a MT sleeve to the saw ...
and used one of my QR MT drive chucks to run it ... very handy tools .. just mount whatever in the multiple carriers I have and they're all quick release to change over :cool: ...
even handier in a lathe tailstock
WP_20150328_11_48_10_Pro.jpg
WP_20150328_11_48_52_Pro.jpg

got the job done anyway ..
trial size up
WP_20150328_19_17_21_Pro.jpg

WP_20150329_13_20_08_Pro.jpg
WP_20150329_13_20_21_Pro.jpg
looked OK in the morning after, so 'twas boss time ..
WP_20150329_15_49_20_Pro.jpg

WP_20150329_15_49_29_Pro.jpg

set them up flat on the bench and .....
WP_20150329_17_34_18_Pro.jpg


gapped and braced it all ...
and transferred it to the bucket ...
WP_20150401_13_51_13_Pro.jpg
and tacked 'em in place
WP_20150401_13_51_35_Pro.jpg

fore adding a few gussets
WP_20150401_15_02_31_Pro.jpg

WP_20150401_15_02_39_Pro.jpg
and starting to nail it all together
WP_20150401_17_05_00_Pro.jpg
WP_20150401_18_29_01_Pro.jpg
 
V8Druid

V8Druid

do it as well as you can,but learn to do it better
Fincord M? Tidy welding, Gra.
cheers Bri ..... may have been, but more likely to have been either Wurth's 6013s or Wolfram 6013 from Essco's locally ... cheap rods, but weld really well (y) (at least they were flogging 'em cheap?) :rolleyes:
 
V8Druid

V8Druid

do it as well as you can,but learn to do it better
so - all nailed up
WP_20150403_14_30_40_Pro.jpg


WP_20150403_15_44_10_Pro.jpg
WP_20150403_15_44_24_Pro.jpg

WP_20150403_16_08_58_Pro.jpg

and hung on the Miller for a trial
WP_20150403_17_11_29_Pro.jpg
WP_20150403_17_13_28_Pro.jpg


then - a bit controversial on CEF but the teeth came off ... wanted an edged bucket
WP_20150403_17_48_29_Pro.jpg

and they could always go back on
WP_20150403_17_48_48_Pro.jpg

and a coat of HBZP grey
WP_20150403_19_51_50_Pro.jpg
WP_20150403_19_52_14_Pro.jpg

and a bit of use .... which turned into a hell of a lot of use - as said - my favourite bucket
WP_20150411_17_27_16_Pro.jpg
WP_20150425_18_32_28_Pro.jpg

legs down for levelling up :rolleyes: ..........
had gotten well used to working FOW by this point ....
in fact it's odd not to rock around a bit when you have the stab.s down :unsure::giggle:

and according to the date stamps on the pix ... this came next ;)
WP_20150412_16_55_04_Pro.jpg
 
Last edited:
V8Druid

V8Druid

do it as well as you can,but learn to do it better
but 'praps not ..... having looked further into the folder ...... :unsure::rolleyes:
remember seeing this ?
WP_20150529_16_30_49_Pro.jpg

well after introducing it to the mighty gas axe ......
after a considerable amount of thought and planning ..

WP_20150529_17_27_56_Pro.jpg

and then some careful trimming ..
WP_20150529_18_15_43_Pro.jpg

ended up with several 'components' ..
WP_20150529_19_07_53_Pro.jpg

and a few extraneous bits
WP_20150529_19_08_00_Pro.jpg

some of the 'components were going to need some 'cleaning up' ...
WP_20150530_12_40_30_Pro.jpg

can't beat a good wedge for separating things

WP_20150530_12_49_34_Pro.jpg

and a good toe jack, with some packers .... after the grinder's had a go, of course
WP_20150530_12_52_35_Pro.jpg

one down ... clean up all the crud and trim as required
WP_20150530_14_29_15_Pro.jpg

#2 ....

WP_20150530_16_57_46_Pro.jpg
WP_20150530_17_06_53_Pro.jpg
they came off way better than expected
WP_20150530_17_08_19_Pro.jpg

clean trim and prep ready for the next bit
WP_20150530_19_14_21_Pro.jpg

off cuts :giggle: ...
hate waste :rolleyes:
WP_20150530_19_14_42_Pro.jpg

planning is 9/10ths of the job ;) .... plus measuring twice/thrice - cutting once :giggle:(y)
bit of thought and it's quite remarkable what you can create form next to now't ....
our Mog's the epitome of that philosophy (y)
but he does have QUITE a toy store to 'shop' in ..... or did have, anyway :rolleyes::cry::cry:

 
V8Druid

V8Druid

do it as well as you can,but learn to do it better
so pile of sundry bits ... looks a bit wet :oops:
WP_20150601_15_38_40_Pro.jpg


suss the next bit with one part clamped in spot .... then tack a few of the sundries in place
WP_20150601_14_30_58_Pro.jpg
WP_20150604_12_36_23_Pro.jpg

WP_20150604_13_13_46_Pro.jpg

ready for a load more
WP_20150604_14_17_07_Pro.jpg

and a lot of consolidating ......... for a trial fit
WP_20150604_16_18_18_Pro.jpg
WP_20150604_16_35_12_Pro.jpg

looked OK
WP_20150604_16_35_23_Pro.jpg


so create the second one and back to the bench
WP_20150606_16_00_39_Pro.jpg

nail a couple of not long enough bits together to make one 'long enough' :giggle: ... nail it in spot and give it a try - again
WP_20150606_16_46_06_Pro.jpg

all cool .. consolidate it
WP_20150606_18_07_05_Pro.jpg

more bits shown the gas axe and ready for a clean up with the disc
WP_20150607_15_35_43_Pro.jpg

and dropped into spot on packers to get the alignment and clearances right
WP_20150608_14_10_49_Pro.jpg

'fore tacking it all up and lifting back into spot to make sure all was well ...... 'fore going for it
WP_20150608_14_48_20_Pro.jpg
 
V8Druid

V8Druid

do it as well as you can,but learn to do it better
happy Druid :giggle:;)(y)fitted as planned
and ..
WP_20150608_14_57_48_Pro.jpg


could drop them on the floor and drive away ...
WP_20150608_15_00_27_Pro.jpg

or pick them off the floor with the blade
WP_20150608_15_00_40_Pro.jpg


back to the bench to get it all nailed up solid
WP_20150608_15_05_30_Pro.jpg


WP_20150608_19_26_53_Pro.jpg

and add a few more gussets
WP_20150608_17_13_04_Pro.jpg

WP_20150608_17_13_09_Pro.jpg

and add a lot more hot stick
WP_20150608_18_48_26_Pro.jpg


fore doing the usual ...HBZP grey oxide, followed by .....
WP_20150608_20_17_52_Pro.jpg

:giggle::giggle:
WP_20150609_17_47_25_Pro.jpg

these have come in very handy .... and have also been subsequently mod.ed / had an att. made for them for the VA-r's use too
WP_20150609_17_55_46_Pro.jpg
WP_20150609_17_55_58_Pro.jpg

WP_20150609_17_56_20_Pro.jpg


that block grab's carrier frame work came in real handy ;):giggle:
so did the rest of it .......................
 
V8Druid

V8Druid

do it as well as you can,but learn to do it better
I have seen it all before๐Ÿ˜‚ but fair play to make something from nothing๐Ÿ‘ as for my pals scrap yard where do you think the โ€œnew roller doorโ€ came from๐Ÿ˜‚๐Ÿ˜‚
yeh - sorry Mog .. CEF -ers will have .... lots won't though :rolleyes:
 
Top