Connecting up tilting ditcher bucket

N

neil1977

New member
Good evening folks,

I’m trying to figure out a way of connecting my tilting ditcher bucket to my 3cx but I’m needing a bit, or a lot of advice!! It’s currently piped for the breaker but I’m unsure of how it will work when tilting ditcher is connected up?? I would like to operate the bucket with the spare rocker on the left joystick but I’d need another block valve as existing one is for extending dipper. Is another block valve expensive? Second hand one maybe?

Again, any help or hints are greatly appreciated.

Neil
 
V8Druid

V8Druid

do it as well as you can,but learn to do it better
Good evening folks,

I’m trying to figure out a way of connecting my tilting ditcher bucket to my 3cx but I’m needing a bit, or a lot of advice!! It’s currently piped for the breaker but I’m unsure of how it will work when tilting ditcher is connected up?? I would like to operate the bucket with the spare rocker on the left joystick but I’d need another block valve as existing one is for extending dipper. Is another block valve expensive? Second hand one maybe?

Again, any help or hints are greatly appreciated.

Neil
fit a 6 x 2 diverter valve after your extenda valve block .... pipes from that to inputs on 6 x 2 ... then the de-energised ports to your extenda ram and the energised ports to plumbing down the dipper, suitably looped to cater for the extenda to have full travel, to some QCs to couple the bucket to.
will then need a switch to change over (energise) the solenoid valve, to enable tilt operation off the extenda control rocker. With the valve de-energised, it will simply be a conventional extanda op.

electrically operated
https://www.ebay.co.uk/itm/Flowfit-...081644?hash=item48c6ddfa6c:g:9oIAAOSwlN9ctdgV
1559157302607.png


or a manually op, mechanical valve (not as convenient as solenoid operated)
https://www.ebay.co.uk/itm/Flowfit-...881443&hash=item416f089678:g:BksAAOSwznVazNLY

1559157358113.png
 
V8Druid

V8Druid

do it as well as you can,but learn to do it better
if you want to avoid more plumbing around the king post ... put the 6 x 2 on the boom at the ends of the hoses feeding the extenda and feed the ram for that from there and the other new lines too ;)
will obviously need to be the electrically operated option for that (y)
 
V8Druid

V8Druid

do it as well as you can,but learn to do it better
Shall I just leave my digger at yours graham so you can fit the diverter and take loads of extra pics!!!
LOL :LOL: .... cheaper diverter here guys .. ;)

https://www.ebay.co.uk/itm/6-Port-H...0bar-12v-or-24v/232480718018?var=531782218600

1559161875488.png


this un'd probably do yours Shaun ..... can't imagine you're going to need more than 3/8" porting :unsure:

https://www.ebay.co.uk/itm/6-Port-H...hash=item3620ee31ef:m:mctEKi5P35C-c1GoSQWFeig


a n d .... just found some real nice low profile, compact dual acting solenoid valves .... ideal for a MkII VA-r ..... or a smaller one :giggle::giggle:;)

1559162966313.png

https://www.ebay.co.uk/itm/4-Bank-H...hash=item3621303947:m:m0wQbclwWYUxTgPfFIJNZSA
not as cheap as cetop3,s but bloody neat and tiny in comparison :cool::giggle:
 
Left hooker

Left hooker

Well-known member
Good evening folks,

I’m trying to figure out a way of connecting my tilting ditcher bucket to my 3cx but I’m needing a bit, or a lot of advice!! It’s currently piped for the breaker but I’m unsure of how it will work when tilting ditcher is connected up?? I would like to operate the bucket with the spare rocker on the left joystick but I’d need another block valve as existing one is for extending dipper. Is another block valve expensive? Second hand one maybe?

Again, any help or hints are greatly appreciated.

Neil
How new or old is the 3cx ? Sounds like servo seat model and if so left rocker would be for 2 way option on hammer line have you got a switch on dash for hammer and 2 way or just hammer ?
 
N

neil1977

New member
Its a 63 plate 3cx and yes it’s servo controls. There is only a switch on dash for hammer. I’m just lacking a wee bit knowledge and confidence, I could do most of the work myself but I’ll get a neighbour who’s pretty clued up to assist me. The help on here is invaluable
 
Left hooker

Left hooker

Well-known member
Its a 63 plate 3cx and yes it’s servo controls. There is only a switch on dash for hammer. I’m just lacking a wee bit knowledge and confidence, I could do most of the work myself but I’ll get a neighbour who’s pretty clued up to assist me. The help on here is invaluable
I would see if jcb do a kit to make it 2 way or hammer as I'm betting wires are there just the change over solenoids are not fitted and a few extra small pipes that sit up under the back end
 
CPS

CPS

Well-known member
I would see if jcb do a kit to make it 2 way or hammer as I'm betting wires are there just the change over solenoids are not fitted and a few extra small pipes that sit up under the back end
Id agree, I put rototilts on a few 4CXs and they were double acting, it wouldn,t be hard to convert. one another note, if you ordered extra rotation lines on a new one they come from the factory the same as druid suggested, 6/2 diverter on the extra dig lines.
 
N

neil1977

New member
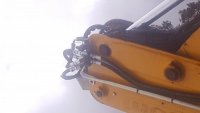
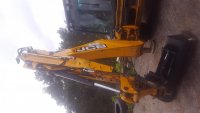
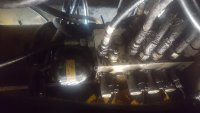
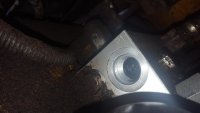
I’ve finally gotten around to getting my tilt ditcher hooked up! Followed what Druid said.
FA8197D7-A41E-4D86-90AA-C14E1326516B.jpeg
B8FBC94C-77FD-43F6-8DCD-22F34D84BCDC.jpeg
FA8197D7-A41E-4D86-90AA-C14E1326516B.jpegB8FBC94C-77FD-43F6-8DCD-22F34D84BCDC.jpeg
 
N

neil1977

New member
I was using it for an hour and I noticed a large pool of hydraulic oil underneath. After a bit of investigation it turns out pilot valve manifold has a crack in it! What a nightmare! Does anyone think this could be connected to the recent pipework for the tilt ditcher?? I can’t see why and I’m hoping it’s just a coincidence. I’ll post some photos of it.
 
N

neil1977

New member
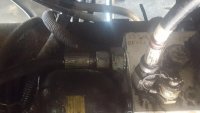
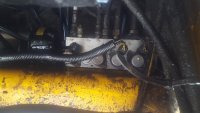
Here are some photos of the valve and if you look at bottom image, a hairline crack is visible. I have priced a new one from Scot JCB and it sure ain’t cheap, which I expected. Would anyone have any suggestions as to where I might pick up one a bit cheaper? Part Number 333-E1540-1.
 

Attachments

  • BCE8C97E-54F7-4B46-8DC2-0204244DE4E0.jpeg
    BCE8C97E-54F7-4B46-8DC2-0204244DE4E0.jpeg
    102 KB · Views: 354
  • 5CAFDFC8-9D02-4792-83ED-FBE3B4A562CC.jpeg
    5CAFDFC8-9D02-4792-83ED-FBE3B4A562CC.jpeg
    120.5 KB · Views: 286
  • D28E2334-92ED-487F-8C21-AD6F0043B427.jpeg
    D28E2334-92ED-487F-8C21-AD6F0043B427.jpeg
    118 KB · Views: 356
  • E051C881-C656-4D1B-8DF6-9B4AEA92D577.jpeg
    E051C881-C656-4D1B-8DF6-9B4AEA92D577.jpeg
    109.4 KB · Views: 338
V8Druid

V8Druid

do it as well as you can,but learn to do it better
I’ve finally gotten around to getting my tilt ditcher hooked up! Followed what Druid said. View attachment 7210View attachment 7211View attachment 7210View attachment 7211
;):giggle: looks tidy (y) ... is that 6 x 2, a case drain type, or no port for it ? :unsure: ..... some will function without one , but if it has a case drain port you should really plumb a free 6mm line back to tank, just to cope with any leakage in the shuttles ...
if it has any and no free to tank line, the solenoid will eventually not be able to overcome any back pressure in the body of the valve and it won't change over. Realistically it should n't leak to case, but for some reason some do ?? :confused: :unsure::unsure:

bet it's nice to have that tilting on the rocker at the flick of a switch/press of a button :cool:

as for your leak .... can't see that anything you will have done could have effected that crack ..... you're simply routing that particular service to alternate locations ... a sad coincidence'd be my opinion ........ bet that valve block is not going to be cheap either ... tbh I can't actually see the crack in the pix, but must be minute to not be spraying ?
as a Pro-tem measure which might work a long time if you're lucky, I'd steam it off, as clean as possible and I mean steam not pressure wash the block and bond a small ali patch over the offending area with some devcon/belzona/plastic steel type compound with as thin as possible a bonding layer .... give it a good 24hrs to harden, more if you can and see how that fares ... little to lose and everything to gain
 
V8Druid

V8Druid

do it as well as you can,but learn to do it better
is this it??
BCE8C97E-54F7-4B46-8DC2-0204244DE4E0.jpeg


bitch of a spot if it is :(:(
could get it TIG-ed up and re-tap the port ... but'd need taking off and probably stripping of any seals, etc. :(
 
Shovelhands

Shovelhands

Well-known member
Try cleaning the threads and refitting the fitting with some decent quality Anerobic Hydraulic thread sealant. It’s not the cheapest stuff, but might be the best £25 you’ve spent! It’s usually relatively low pressure in the servo circuit, so you stand a chance of sealing it. Roth a try before you bust out the big bucks on a new valve!

If looking for an alternative, try Eric Warburtons, Vicary Plant Spares and possibly First Plant Sales
 
N

neil1977

New member
is this it?? View attachment 7221

bitch of a spot if it is :(:(
could get it TIG-ed up and re-tap the port ... but'd need taking off and probably stripping of any seals, etc. :(
Yes that’s it, crack is near bottom side of thread. I could feel the crack with my fingernail. I’m going to try steaming it and then seal it. I’ll try everything before splashing out!
 
V8Druid

V8Druid

do it as well as you can,but learn to do it better
Yes that’s it, crack is near bottom side of thread. I could feel the crack with my fingernail. I’m going to try steaming it and then seal it. I’ll try everything before splashing out!
by ''bottom side'' I presume you mean where I arrowed ? could well be vee-ed and TIG-ed, as I said .... good TIG man with a nice fine touch'd make a good job of that ...... it's all the sundry hassle that'd go with getting it done is the major grief :cry: ... TBH I really can't see why it's split ..... if it were a tapered adaptor in there I'd understand it, but it's a parallel union with a dowty on a mate face, so it's really odd, unless it's had a trauma , but can't see how???? :unsure: .... over-dogging that adapter'd strip the threads, not burst the port :confused::confused:
 
wee_gus

wee_gus

Well-known member
Be worthwhile doing as Druid says, I’ve had it before on a mini on main valve block,
Managed to repair it and to my knowledge is still going.
That a MIM or Bulldog attachments tilting bucket?
 
N

neil1977

New member
by ''bottom side'' I presume you mean where I arrowed ? could well be vee-ed and TIG-ed, as I said .... good TIG man with a nice fine touch'd make a good job of that ...... it's all the sundry hassle that'd go with getting it done is the major grief :cry: ... TBH I really can't see why it's split ..... if it were a tapered adaptor in there I'd understand it, but it's a parallel union with a dowty on a mate face, so it's really odd, unless it's had a trauma , but can't see how???? :unsure: .... over-dogging that adapter'd strip the threads, not burst the port :confused::confused:
It’s a bit further down than that. Crack is coming from port down towards damper
 
N

neil1977

New member
Be worthwhile doing as Druid says, I’ve had it before on a mini on main valve block,
Managed to repair it and to my knowledge is still going.
That a MIM or Bulldog attachments tilting bucket?
Hi, it’s a digbits made tilt bucket. Very happy with it after only an hours use! 🙈
 
Top