miracles performed - more tales from the Druid's workshop

V8Druid

V8Druid

do it as well as you can,but learn to do it better
OK ..... seem to have wet a few appetites yesterday ?
T'ain't plant, but it's a blog so WTF :giggle:

this one, although small was a 'bit special' ;)and worthy of its own commentary:giggle::giggle: ..... chapter and verse :p:LOL: ........ so pull up a chair and get the pop corn out :giggle:


Guy came to me one day with the usual ... " my boats got a bit of a leak - a big one - if I arrange for it to be pumped out, can you get it off the water when it's afloat again " :unsure::giggle::giggle:
Bitch of a location, but fortunately not a very big, or heavy boat, so the lil' Rapier'd do the job ... sod all else was going to get to where it was. o_O

brought it into the yard and left it drain out fully, for a day or two, before getting it into the shop.:rolleyes:
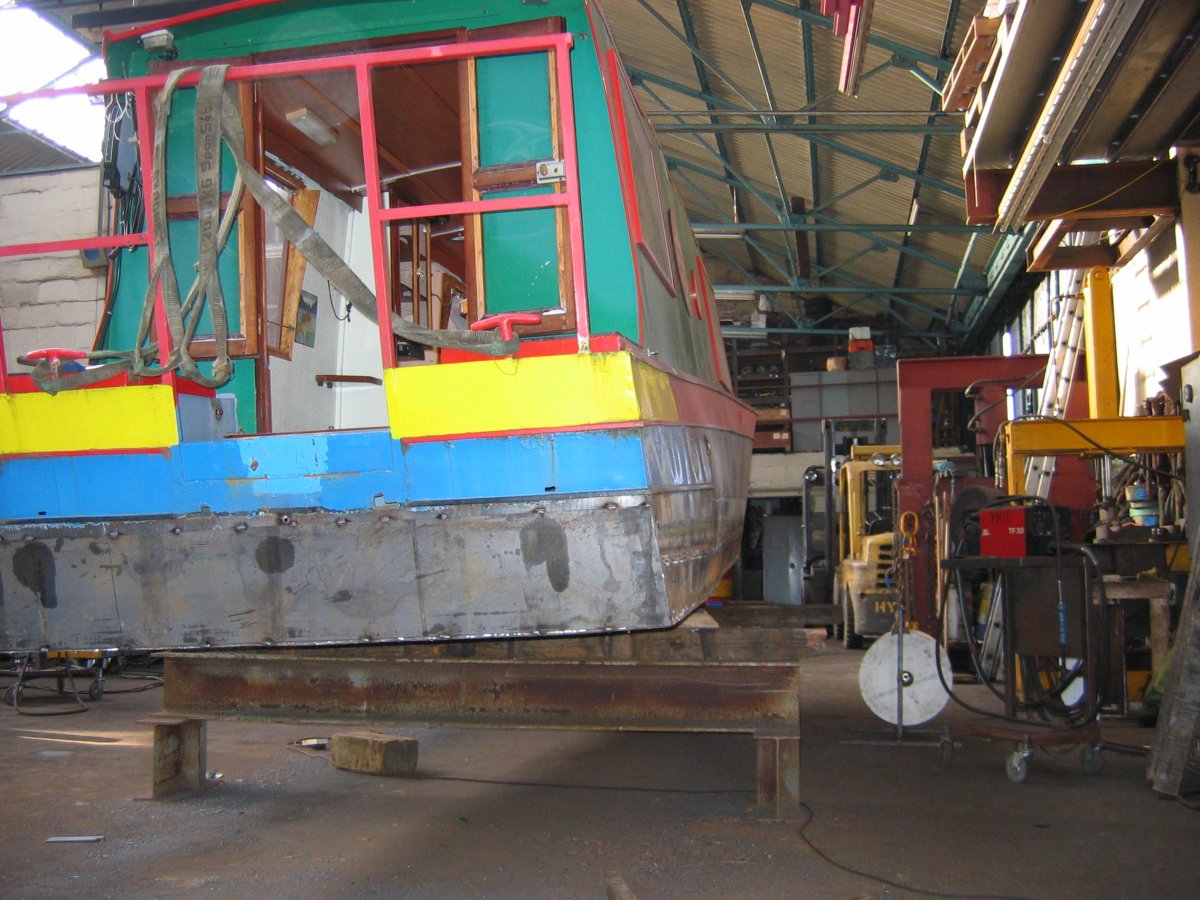
Was a bit flexible when we picked it out the water, but having had a good look at it, we'd decided that, at best, this thing was maybe 2-ish+ mm thicko_O ... or should I say THIN :oops: ... plates/sheets .... never seen one less than 3mm plate and trying to handle this thing was like jelly juggling :eek::LOL:

Anyway ..... we got it in and onto some trestles .... carefully :cautious: (all these things, no matter how much of a dog they were, were 'someone's babies' ) and we treated them with care :cautious: .... we usually had enough to repair, anyway, without any more 'issues' arising :( ...... and this one needed kid gloves;)

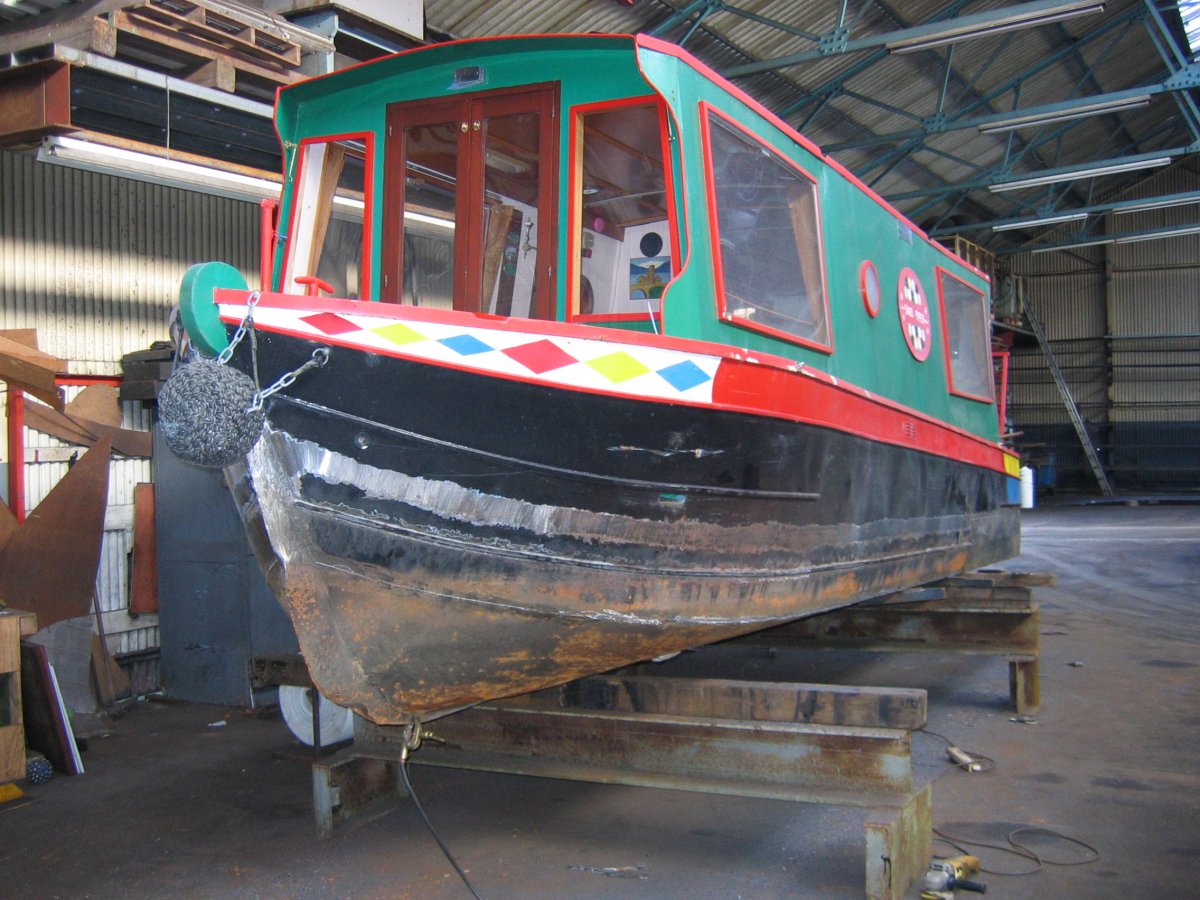
We'd normally start by finding material good enough to attach the repair plates to and this one was gonna be a real challenge :oops:
IMG_0776.JPG


IMG_0777.JPG

IMG_0778.JPG

we took our hats off to whoever had built it originally:eek: ... like origami in sheet steel :oops: ... also realised, on examination that this'd been through several 'past lives' and'd been altered/extended before :(:unsure:, which was going to make for some interesting 'details' :censored:

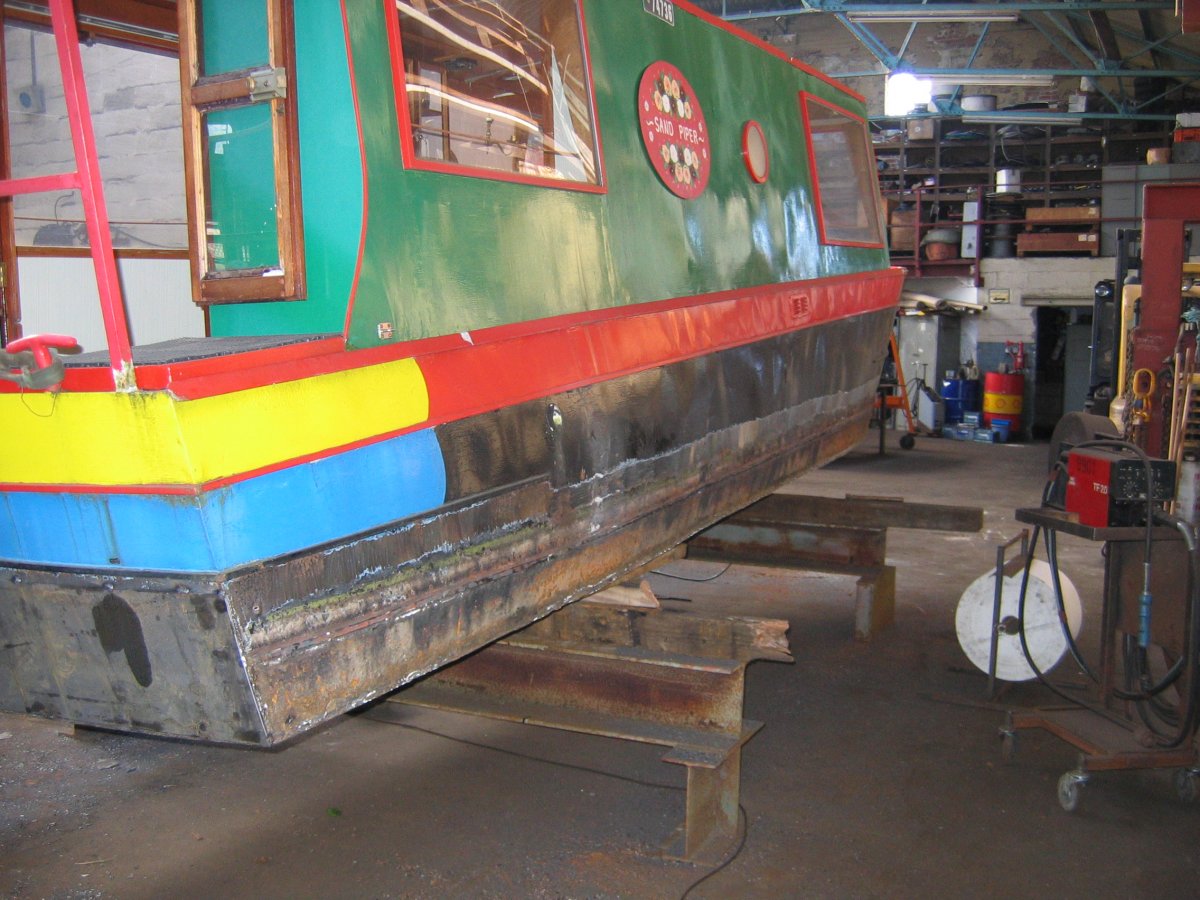
so, as said ... find summat to weld to ..... the overplate had been agreed at 4mm .... any more and'd have been too heavy going back in, so we were effectively doubling up on the hull thickness :rolleyes: ... anyone who's tried welding 2mm to 4mm will know where I'm coming from with regard to 'issues' :giggle:
the stern was the easiest, straightest and probably the most solid part to start with......:rolleyes:
IMG_0779.JPG

IMG_0780.JPG

IMG_0781.JPG

IMG_0782.JPG


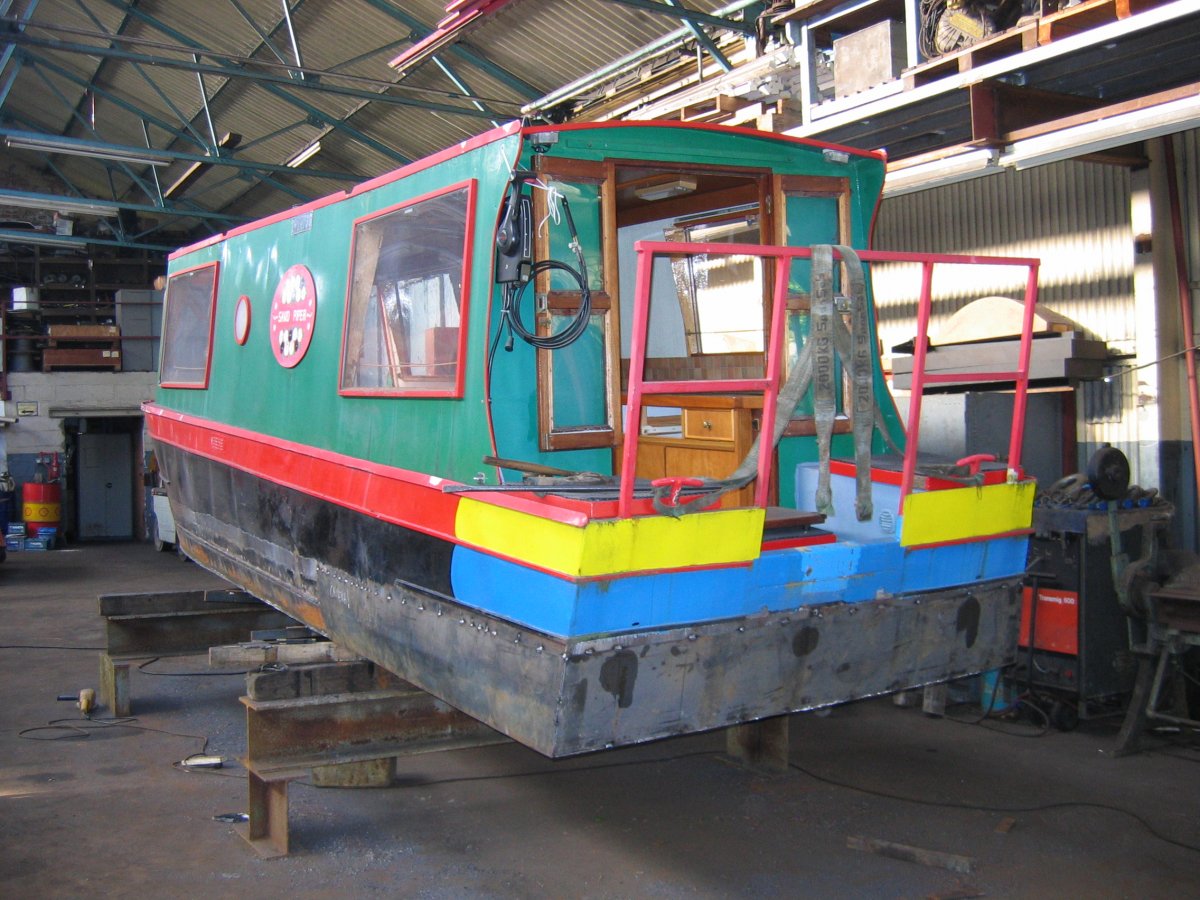
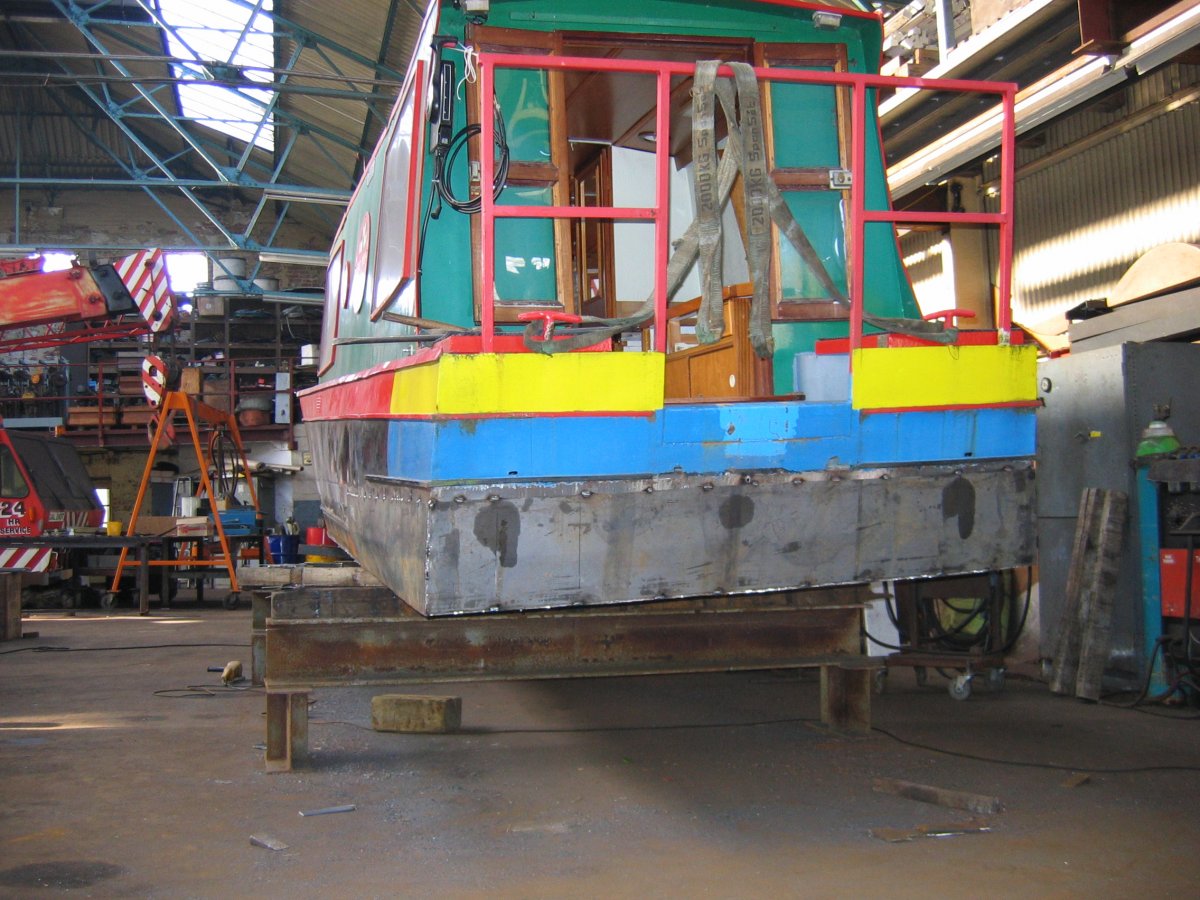
after cleaning off the hull of anything extraneous :confused:..... like welded on patches, rubbing strakes, lumps of weld, fibre-glass patches, pitch plugs, whatever :rolleyes: and cleaned a stripe around the hull at a suitable height, above the water line, we'd cut and shape suitable plates ready for stitching in position .... this one was a particular PITA as we also had to put a fold line into some of the panels to follow the original lines, under them ... can just about see it in 4th pic, but'll be more visible shortly / further on. ;)

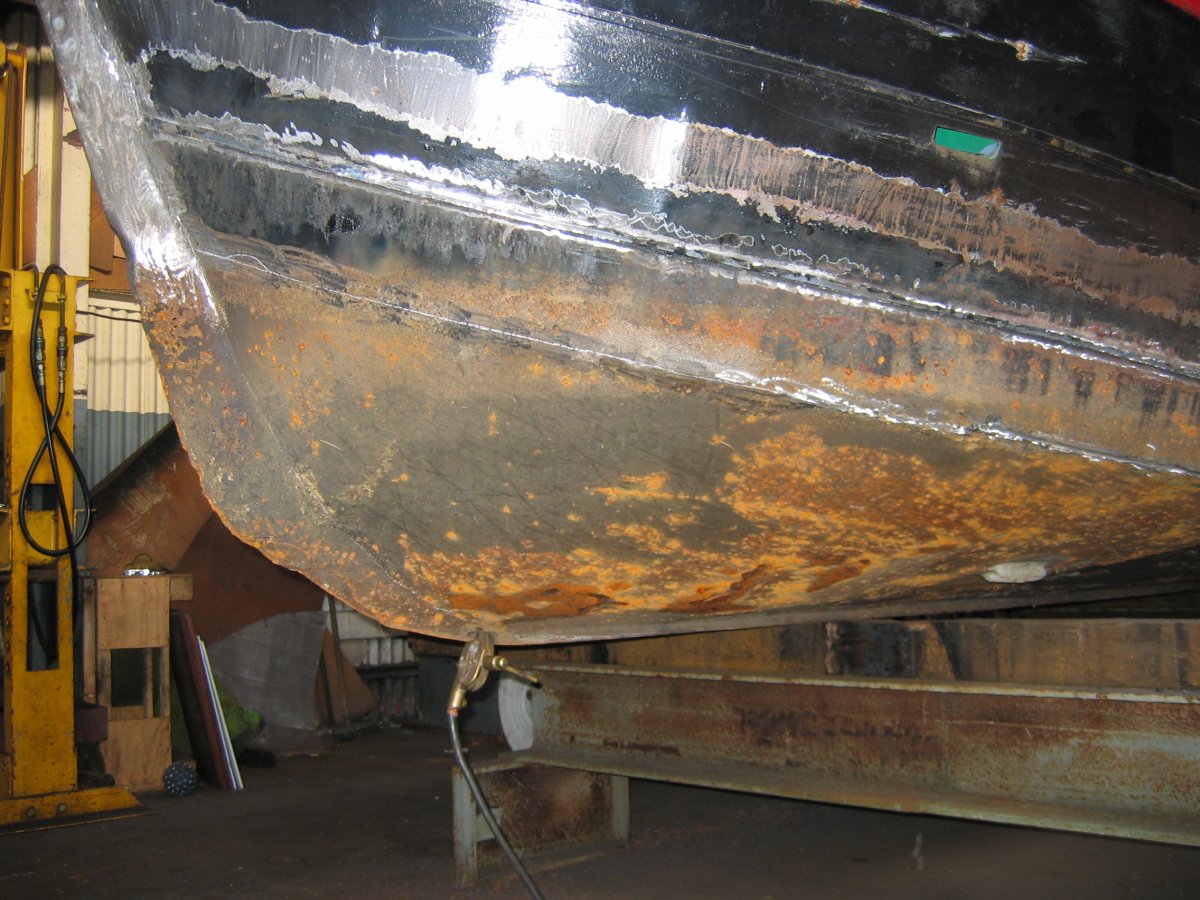
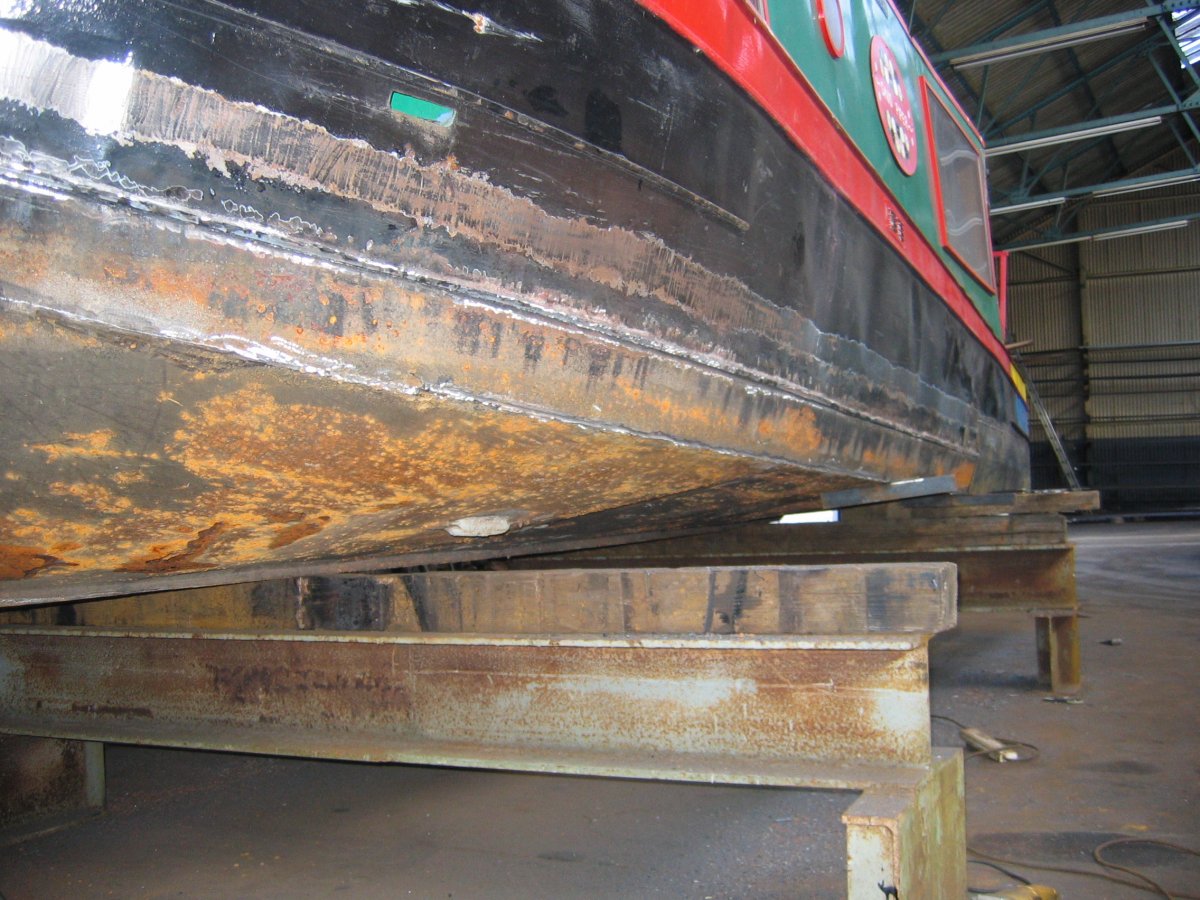
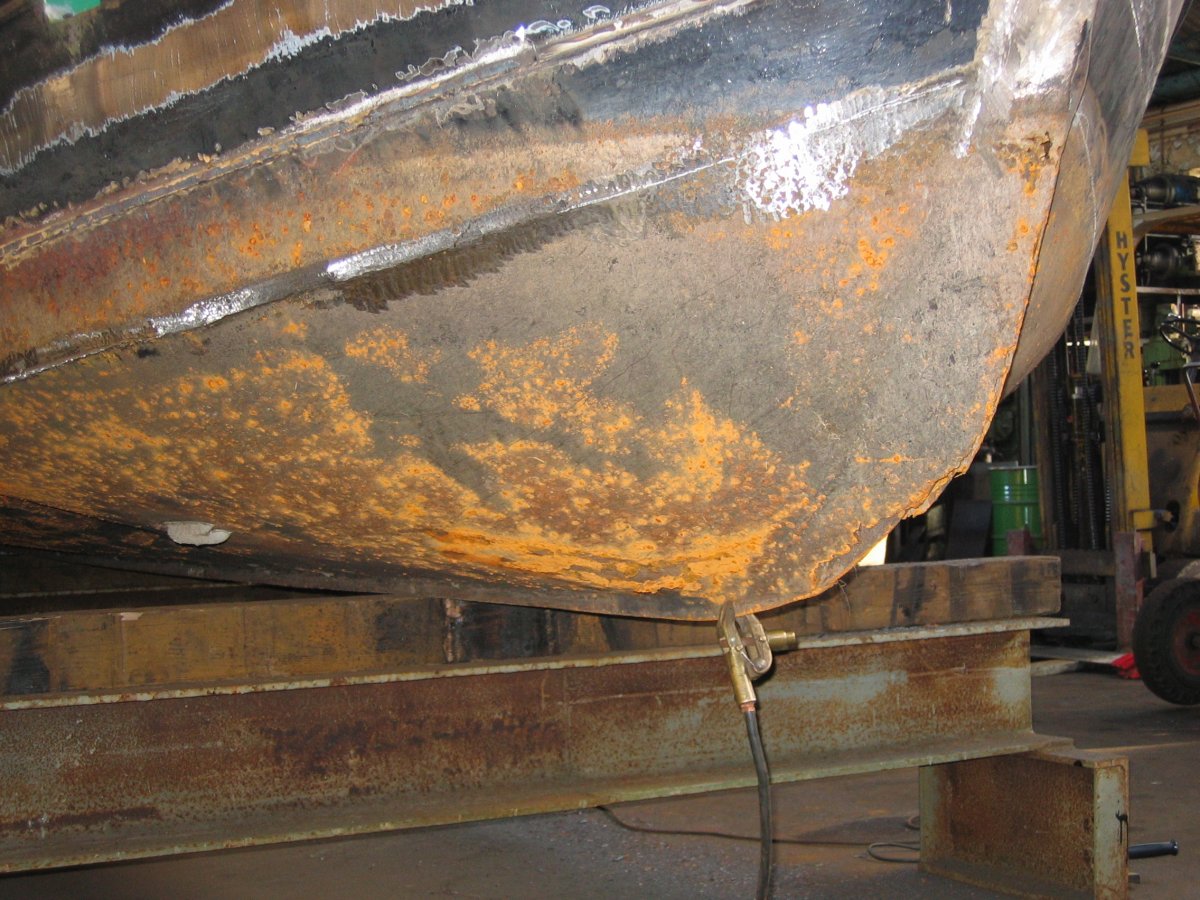
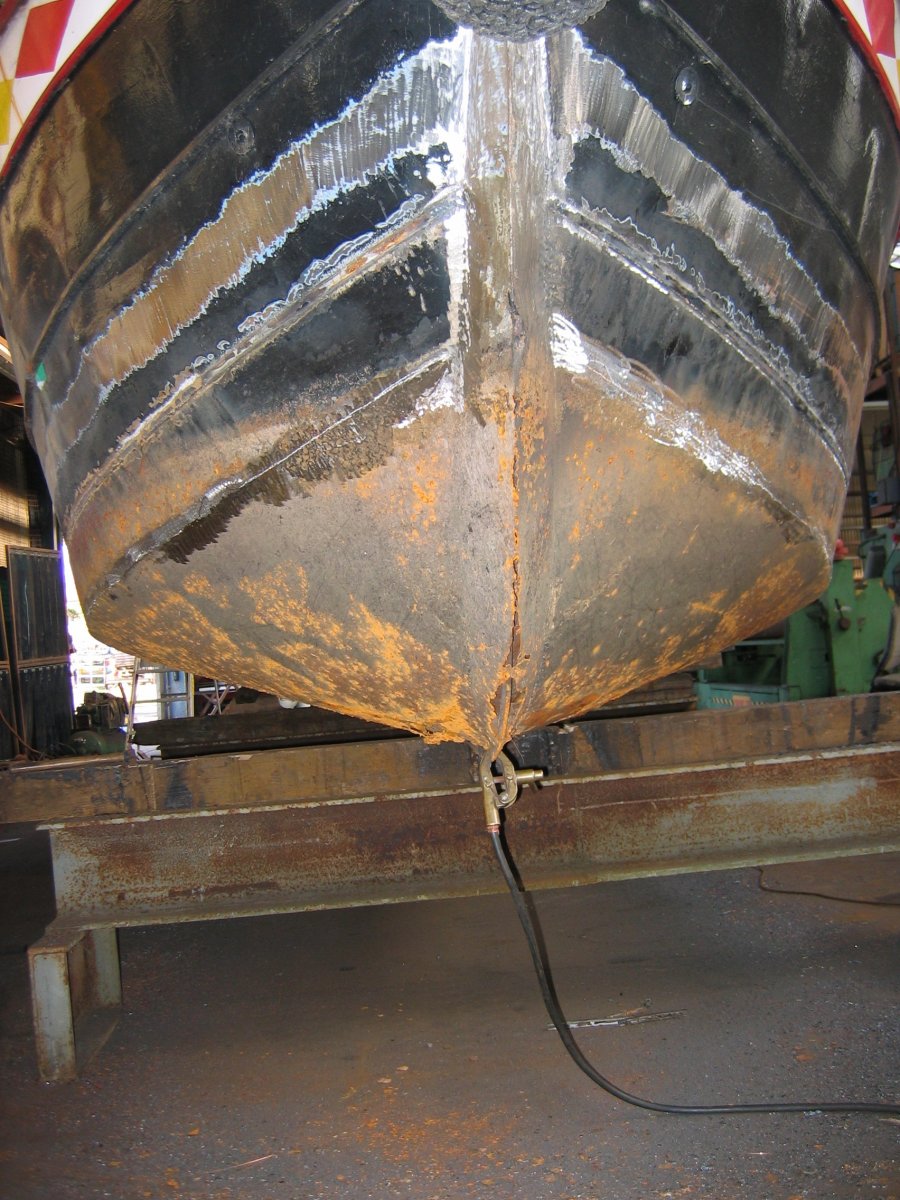
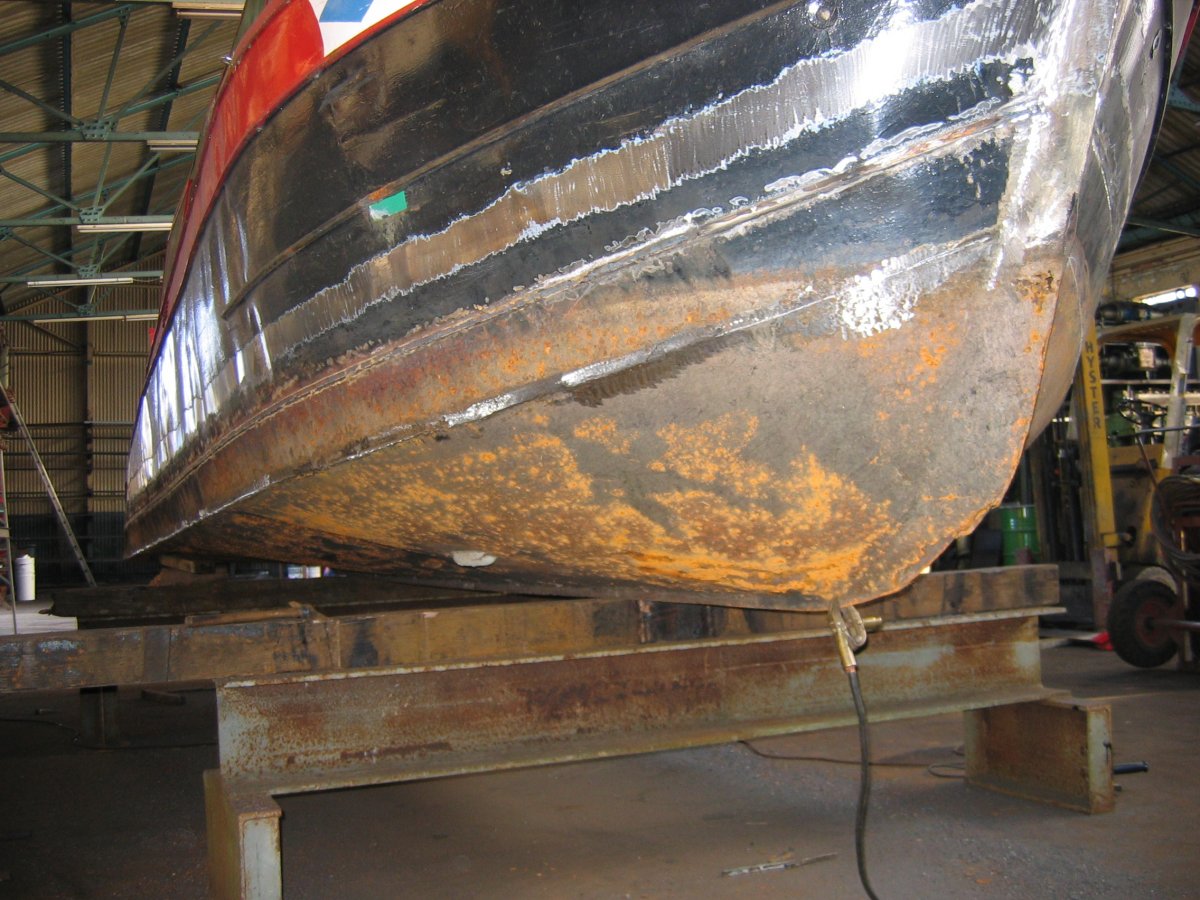
moving forward to the prow, it'd appear that the only thing keeping the bugger afloat, had been the build up of crud in it:unsure: ... Malcolm, the owner, had given it a bit of a knock apparently, shortly before it'd started shipping water and presumably disturbed whatever was passing for caulking and keeping the water out :oops: ...... that was aside from all the other holes in the bilge plates, that were equally well caulked, by the pustules of rust and tish that, we'd found from experience, kept most of these 'past their sell buy date' tubs, afloat o_O
IMG_0783.JPG

IMG_0784.JPG

IMG_0785.JPG

you can see the 'pustules' covering the bilge plates .. and these are little uns :oops: .... some were right through ... others were craters with paper thin bottoms !!:rolleyes:
your average canal boat is covered in these ...... if they ain't maintained properly ... i.e. lifted out every 12-18months, allowed to dry, scraped and wire brushed off and re-blacked with a couple of coats of best bitumenous :) ..... owning one of these is not a cheap hobby ... done right ;)(y)
 
Last edited:
V8Druid

V8Druid

do it as well as you can,but learn to do it better
right... the boat fairies came in the night and spun it around :giggle:
IMG_0790.JPG

can see the bends in those side plates easier now ;)
IMG_0791.JPG
IMG_0794.JPG

all stitched on, bar the foremost plates, which needed to have that prow dealt with, before we could get them on
IMG_0795.JPG

IMG_0796.JPG

very often when trying to repair these things it was a case of patchwork quilting type of thing, to get some of the shapes ... beauty of steel is once you've got the shape right, it's not difficult to make it all 'one piece' again with the hot torch :giggle:
IMG_0799.JPG


must've been a rough night in the shop .... damned things blown over ....:giggle:

IMG_0805.JPG


can just about see there, a change of shape in the bilge plating ............ where a few feet had been added to the arse end of it o_O

[and a lot better in this shot] :rolleyes:
IMG_0806.JPG

but not very well :giggle:
IMG_0807.JPG

and before anyone asks ..... yes I do have a few pix of that truck ... and no it wasn't mine .... customers in for some work :rolleyes::giggle:

so .... having got it so we can properly see the next part of the challenge :oops:...... we had a major head scratch and a cuppa or two :unsure: ... before removing the sacrificial anodes and anything else in the bloody way, before a good clean off, to decide WTF we were going to do with it :unsure::giggle: aside from finish off titivating the prow:giggle: and the foremost side plates

IMG_0809.JPG
 
M

Monkeybusiness

Well-known member
Must have been a real dinky thing before the extension! It wasn’t built that way to accommodate a prop somehow?
I guess the anodes weren’t up to the job...
 
V8Druid

V8Druid

do it as well as you can,but learn to do it better
then it gets heaved over as far as we dare take it ......:oops:
IMG_0810.JPG

or a bit more sometimes:) .... but the cabin wasn't going to stick it on this un, :(so that was the limit .......:rolleyes:
and we proceed to fit the new over skinned bilge plating .... each joint is gapped so we can catch it to the exisiting bilge plate and in this case very carefully attached with the 'hot torch'
now I'm real sorry about this and I can only guess I either forgot the camera that day or some other reason .....
IMG_0815.JPG


I'll have to find you some pix from another one ..... but as you see ...... the plates get folded to suit the required shape and attached .....
IMG_0816.JPG


individually as we worked our way along the length of the hull's bilge .....
IMG_0817.JPG

the front two panels then got secured separately ...
IMG_0820.JPG
IMG_0822.JPG


and seam welded ..... everywhere :rolleyes: .... one left to fit and looks like we turned her over/around for the last one ........
IMG_0824.JPG

rubing strakes were fitted to the sides to match whatever had come off/was still on there and in this case the chap wanted this 'anti corrosion' coating applied .... waste of 80 quid IMHDO .... our black 'tar' always keyed better to bare steel and the first time he rubbed the bottom this lot was gonna be history anyway :rolleyes:
you can also see the additional sacrificial wear 'rubber's' all along the edge of the chine .... most vulnerable part of the hull in the Mon & Brec.'s 'deep ditch' navigation :oops::giggle: and'd save years of wear to the hull itself ..... again a proper maintenance regime would see these replaced, as necessary, as they wear out :rolleyes:
IMG_0828.JPG

new sacrificial anodes fitted and the paint touched up as needed ...... looks a bit more like a decent hull now(y)
IMG_0830.JPG
 
V8Druid

V8Druid

do it as well as you can,but learn to do it better
Must have been a real dinky thing before the extension! It wasn’t built that way to accommodate a prop somehow?
I guess the anodes weren’t up to the job...
TBH MB .... it's such a soft water area that the anodes rarely get 'eaten' badly .... if you can see those they're almost as good as new and'd been on there years
yes it must've been bloody tiny .... always been an outboard craft .... Malcolm did tell me the history of it later, but can't recall it, I'm afraid, but as we saw it, it was its third incarnation :oops: :giggle::giggle: ..... only the two of 'em and they used it mostly as a weekender .... I've seen a lot worse and was very light and airy for a canal cruiser.
The local canal doesn't connect to the network at all, so is very limited on cruising .... but TBF to it, very pretty ..... it's a contour canal and follows the lie of the land, often cut into the hillside, so has some glorious views of the surrounding countryside ... and not too many locks ;) :)
 
V8Druid

V8Druid

do it as well as you can,but learn to do it better
so ..... next stage of the game was ......
a thorough inspection and drop it back on its keel .... get a rub strip on the prow, to re-enforce it for ice breaking and 'pour' a major weld around the bilge/chine plate joint, to fully seal it up and fully weld the side plates to the existing/original hull .... a n other thorough inspection ..... then get it painted up

IMG_0832.JPG

IMG_0841.JPG


we always 'over-ran' the bilge plates, beyond the side repair plates, as an extra wear edge, by a good 12-15mm .... plenty to wear back before it got anywhere near the welds :cool:
IMG_0834.JPG

and the underside rub strip protected the under side of that edge(y)

any odd jobs, like repairs to the self draining window hoppers got done .....:rolleyes:
IMG_0838.JPG
IMG_0840.JPG

and touched up with primer ...then it was a couple of coats of Firwood's finest Black bituminous tar :giggle:

IMG_0848.JPG
IMG_0844.JPG
IMG_0842.JPG
IMG_0850.JPG

and she was ready to go home (y)
The original hull was effectively sat in a brand new hull ... the side repair plates were always set a good 4+ inches above the water line and it was completely sealed in, in circa 1200mm section, along its length ..... enthusiastic owners would resin seal any pit holes internally, if they could access them to prevent any bilge water getting between the skins, wherever it was possible and recommended to buy a new good quality, automatic bilge pump set up, to help maintain their newly refurb.-ed toys, in as dry a state as possible :rolleyes::giggle: ...... but we are talking canal boat owners here :rolleyes::( ..... I doubt this has ever been back off the water :( and went back on in March 2007 :unsure:

To date ..... we never had a leak on one we did :)
 
V8Druid

V8Druid

do it as well as you can,but learn to do it better
three more sat waiting repatriation, after being done and a n other awaiting further attention ...

IMG_0885.JPG

..... the hull got completely gutted out on that one, after it'd spent a few weeks on the bottom ....
we'd done it the previous year, got paid for it, repatriated it and the owner died ....
his missus didn't realise that they needed to keep the batteries charged for the bilge pumps, so it eventually succumbed to mother nature's deluges, filled the engine bay, sank the stern and then flooded the rest.:(
I took it into the yard as a favour to BWW who'd gotten involved due to the circumstances :rolleyes: and eventually found her a buyer for it, at a decent figure.
He came in, gutted it, ready to have some alteration work done to it, then completely vanished off the planet :oops::unsure:
Spent a year and more trying to trace him :unsure::oops: ..... when I cleared the yard out it was still there, several years later, so went to the highest bidder, to 'defray storage costs' ;) ...... I just wanted it gone .... (y)

it went ..... :giggle::giggle:
2014-05-07 15.12.31.jpg
2014-05-07 15.13.24.jpg
2014-05-07 15.13.39.jpg

.......about 200 yards across the road to a mate's yard, after he made me the best offer :giggle: (knowing what they're worth, tidied up):rolleyes: ... even a stripped bare hull like that'd make £4-5k, having been fully re-plated by us
must ask him what he made out of it, next time I see him ... a lot knowing Julian :giggle:
 
TiltyShaun

TiltyShaun

Well-known member
three more sat waiting repatriation, after being done and a n other awaiting further attention ...

View attachment 4028
..... the hull got completely gutted out on that one, after it'd spent a few weeks on the bottom ....
we'd done it the previous year, got paid for it, repatriated it and the owner died ....
his missus didn't realise that they needed to keep the batteries charged for the bilge pumps, so it eventually succumbed to mother nature's deluges, filled the engine bay, sank the stern and then flooded the rest.:(
I took it into the yard as a favour to BWW who'd gotten involved due to the circumstances :rolleyes: and eventually found her a buyer for it, at a decent figure.
He came in, gutted it, ready to have some alteration work done to it, then completely vanished off the planet :oops::unsure:
Spent a year and more trying to trace him :unsure::oops: ..... when I cleared the yard out it was still there, several years later, so went to the highest bidder, to 'defray storage costs' ;) ...... I just wanted it gone .... (y)

it went ..... :giggle::giggle:
View attachment 4030View attachment 4031View attachment 4029
.......about 200 yards across the road to a mate's yard, after he made me the best offer :giggle: (knowing what they're worth, tidied up):rolleyes: ... even a stripped bare hull like that'd make £4-5k, having been fully re-plated by us
must ask him what he made out of it, next time I see him ... a lot knowing Julian :giggle:
I don’t have my glasses on but I am not sure the one on the far left is a boat!!
 
Grahams

Grahams

Don't complain - suggest what's better
I don’t have my glasses on but I am not sure the one on the far left is a boat!!
It's the economy version.
 
Last edited:
Shovelhands

Shovelhands

Well-known member
One of my intentions over the summer is to put a outboard on one of mine.....

A guy I know made a boat, out of a 6 wheeler tipper body. It had 45 gal barrels down each side for stability, a big outboard on the back and ramps in and out of it. He used it to get tractors on and off an island and fall a buch of trees.
 
J

Jimoz

Well-known member
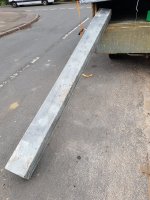
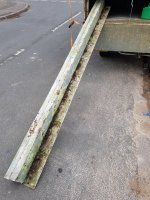
Apologies for file size to owners of forum. Must set my new phone not to take such large. Anyway does this lintel need any coating in your experts opinions. It's galv but few surface blemishes. Should I be red oxide or black hammeritiing before putting in?
 

Attachments

  • 20181231_135709.jpg
    20181231_135709.jpg
    362.7 KB · Views: 347
  • 20181231_135653.jpg
    20181231_135653.jpg
    391.2 KB · Views: 336
S

Smiffy

Well-known member
Apologies for file size to owners of forum. Must set my new phone not to take such large. Anyway does this lintel need any coating in your experts opinions. It's galv but few surface blemishes. Should I be red oxide or black hammeritiing before putting in?


If its galvanized you can get galvafroid cold galvanising paint to repair any holes rather than painting the whole thing
 
J

Jimoz

Well-known member
What's quickest easiest and cheapest though? It's not a massive lintel if I have to paint the whole thing and wouldn't mind the underside being black to match door anyway
 
Quattromike

Quattromike

Well member-known
What's quickest easiest and cheapest though? It's not a massive lintel if I have to paint the whole thing and wouldn't mind the underside being black to match door anyway
Yeah if it’s gonna be sitting on concrete I’d say give her a coat with the bituminous paint as mention by @V8Druid
 
V8Druid

V8Druid

do it as well as you can,but learn to do it better
Apologies for file size to owners of forum. Must set my new phone not to take such large. Anyway does this lintel need any coating in your experts opinions. It's galv but few surface blemishes. Should I be red oxide or black hammeritiing before putting in?

If its galvanized you can get galvafroid cold galvanising paint to repair any holes rather than painting the whole thing

What's quickest easiest and cheapest though? It's not a massive lintel if I have to paint the whole thing and wouldn't mind the underside being black to match door anyway

Yeah if it’s gonna be sitting on concrete I’d say give her a coat with the bituminous paint as mention by @V8Druid

trouble with bituminous is it will bleed through anything you try to over coat it with:oops: - forever :(.... as long as you repeat any treatment with bituminous it'll be fine (y) .... I'd certainly bit. any bits in the masonry or in contact with it :whistle:... anything exposed, if you don't want it black, don't bit. it

the galvafroid is not cheap ..... given the 'state' it's in [well weathered] :) ..... a good brush off to remove the tish and zinc oxide powder that'll have formed .... a coat of High Build Zinc Oxide primer on anything exposed / that you want to paint a particular colour and a damned good coat of bit. on everything else ..... job done (y) ..... Hammerite doesn't key well to galv. or anything else for that matter ... designed to be applied straight to cleaned/brushed off rusted metal surfaces ;)(y)
 
Last edited:
V8Druid

V8Druid

do it as well as you can,but learn to do it better
A guy I know made a boat, out of a 6 wheeler tipper body. It had 45 gal barrels down each side for stability, a big outboard on the back and ramps in and out of it. He used it to get tractors on and off an island and fall a buch of trees.
would've loved to have seen that :LOL:.... brave man putting his tractors in it for sure :eek:
used to make work pontoons for BWW ... basically a flat , wedge ended thing, all compartmentised inside, into floatation 'cells', about 30" deep from memory ... might have some pix somewhere ..... they rode well high in the water empty and'd carry a fair load ..... used them for working on the 'offsides' of the canal with no access.:rolleyes:
 
Top