Pissing about with only half a clue on the shed site.

V8Druid

V8Druid

do it as well as you can,but learn to do it better
Back on the weekend project. Got the rest of my new Lego blocks used up.
Need another £800 - £1000 worth to finish this off. Bit of a bodge up but will sort the issue until I get around to building a proper wall when I have time and money and inclination . Probably not this decade. Will pour some gravel down the back of the boards and plant a bamboo hedge on top to help tie the soil together.
I can order some more scalpings/ 803 and some aggregate now that I have somewhere clean to tip it .
Moved about 20t of waste hardcore with the Tafe and got some Teram down so that the next load of hardcore can be tipped where I want it to save moving it twice.
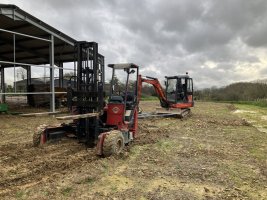
Proper wet today . No cab on the digger or dumper or tractor. At least the Moffett has a bit of Perspex which channels the run off onto my right hand 🤣.
couldn't you have used your crane attachment to handle those blocks Ben ?
 
S

Stroppymonkey

Well-known member
couldn't you have used your crane attachment to handle those blocks Ben ?
Yes.. and it would be better as a hook would allow me to rotate the blocks as well, however I was using the forks to move the boards about and the Jib would have got in the way when I was tipping the boards over with the forks.
Might try it on next time as I need to fit some in the corner which will be harder to do with forks.
 
Last edited:
S

Stroppymonkey

Well-known member
Short days play on the project today. Borrowed the Kubota and started moving the stockpile of hardcore around. It’s looking messy and annoying me . I’ve got a couple loads of scalpings and 803/planings to tidy it up and allow the wacker to work its charm. Hopefully next weekend.
 

Attachments

  • IMG_5741.jpeg
    IMG_5741.jpeg
    412.4 KB · Views: 143
  • IMG_5744.jpeg
    IMG_5744.jpeg
    196.2 KB · Views: 102
  • IMG_5743.jpeg
    IMG_5743.jpeg
    359.1 KB · Views: 106
V8Druid

V8Druid

do it as well as you can,but learn to do it better
Short days play on the project today. Borrowed the Kubota and started moving the stockpile of hardcore around. It’s looking messy and annoying me . I’ve got a couple loads of scalpings and 803/planings to tidy it up and allow the wacker to work its charm. Hopefully next weekend.
could do with a crusher to run that through Ben .... or a 13/15 tonner to track it in a bit
 
S

Stroppymonkey

Well-known member
God I miss the long light evenings ☹️Couple of hours at the weekend poking skip hardcore about until it’s flattish. Charles came up to measure my gates to start make a 20ft electric opening for them. Decided he wanted the gates at his shop as we are going to cut 8” off the bottom and add an extra hinge.
Back today to empty the Ifor Lm166 off and load up the gates. Flat tyre discovered but easy to sort with moffett and impact wrench in the van.
Fuelled the moffett and topped up hyd oil and ran it half a mile up the road for neighbour Dan to borrow for a couple of days on his shed project. It’s not much fun to road it with hydraulic drive, if you run at 100% revs it seems to get hot after half a mile.
The beacon got knocked off by an errant ladder in a recent storm , so I’ve bought a cordless magnetic one from Amazon . VERY bright!
 

Attachments

  • IMG_5779.jpeg
    IMG_5779.jpeg
    351.8 KB · Views: 63
  • IMG_5892.jpeg
    IMG_5892.jpeg
    157.2 KB · Views: 62
  • IMG_5891.jpeg
    IMG_5891.jpeg
    194.8 KB · Views: 55
  • IMG_5890.jpeg
    IMG_5890.jpeg
    373.1 KB · Views: 55
  • IMG_5889.jpeg
    IMG_5889.jpeg
    392.3 KB · Views: 73
S

Stroppymonkey

Well-known member
Wasted an hour of my Sunday unsticking a very stuck Moffett. A bit stickier there than I thought 🫣
IMG_6004.jpeg
 

Attachments

  • IMG_6006.jpeg
    IMG_6006.jpeg
    306.6 KB · Views: 66
  • IMG_6007.jpeg
    IMG_6007.jpeg
    471.2 KB · Views: 71
  • IMG_6008.jpeg
    IMG_6008.jpeg
    339.2 KB · Views: 90
S

Stroppymonkey

Well-known member
did

did you ever consider doing the floor before you built the shed or was it always going to be done once it’s built ?
The floor IN the shed ? Always going to be after. Small end won’t have concrete , large end I plan to fully insulate and time/cash flow always meant it was for the future. 2028 probably 😂
 
Vinpetrol

Vinpetrol

Well-known member
The floor IN the shed ? Always going to be after. Small end won’t have concrete , large end I plan to fully insulate and time/cash flow always meant it was for the future. 2028 probably 😂
Yes the shed . I was wondering about my own which will be a lot smaller than yours 13x8m and less head room . I’ve been thinking about doing it after with the shed up or before when it’s easier to fire the conc in and run roller screed over it . What’s the most popular way of doing it .
 
S

Stroppymonkey

Well-known member
Yes the shed . I was wondering about my own which will be a lot smaller than yours 13x8m and less head room . I’ve been thinking about doing it after with the shed up or before when it’s easier to fire the conc in and run roller screed over it . What’s the most popular way of doing it .
I think the 'best' way seems to be to lay the floor AFTER the frame but before the roof, then you can pump it in and still work around the outside for screeding. 13x8 still a nice size shed :)
 
M

Monkeybusiness

Well-known member
Yes the shed . I was wondering about my own which will be a lot smaller than yours 13x8m and less head room . I’ve been thinking about doing it after with the shed up or before when it’s easier to fire the conc in and run roller screed over it . What’s the most popular way of doing it .
From an ease of building perspective it would be amazing to work off an existing perfect concrete slab!
However, it seems to be ‘the norm’ to stone up and build off that, with the floor going in last. This prevents damage to the finished floor, allows for ‘alterations’ (missed ducting/pipe work can be dug in etc), and you can decide at any point if you want more insulation etc.
The rule of thumb with shed building is to have a yard/laydown area the same size as the building to work off/store materials apparently. This rings true having built my own. Definitely level and stone up as large an area as you can get away with!
 
S

Stroppymonkey

Well-known member
From an ease of building perspective it would be amazing to work off an existing perfect concrete slab!
However, it seems to be ‘the norm’ to stone up and build off that, with the floor going in last. This prevents damage to the finished floor, allows for ‘alterations’ (missed ducting/pipe work can be dug in etc), and you can decide at any point if you want more insulation etc.
The rule of thumb with shed building is to have a yard/laydown area the same size as the building to work off/store materials apparently. This rings true having built my own. Definitely level and stone up as large an area as you can get away with!
That is my plan. Outside space about double that of inside. Wet clay ground means lots of groundworks though :-(
 
S

Smiffy

Well-known member
I think the 'best' way seems to be to lay the floor AFTER the frame but before the roof, then you can pump it in and still work around the outside for screeding. 13x8 still a nice size shed :)

We always put the roof on. Gives the best chance of getting everything done and not having to wait on the weather.
If you have the time reverse the lorry down one side and poor the other then wait 7 days and do the reverse.
Or if it's big do chequer board so you can work on four sides of a manageable slab.
 
pettsy

pettsy

Well-known member
Only big shed build I’ve been involved was this one, the floor was poured last with k-forms. With the roof and panel work finished it means there’s no problems with weather during the pour and finishing.

I’d love to show some pics of it finished inside, the owner really treated himself after years of making do with a smaller workshop. Lots of even lighting with no dark spots, plenty of single and 3 phase power sockets, an overhead gantry crane etc!

IMG_0356.jpeg
 
Last edited:
M

Monkeybusiness

Well-known member
I used a firm with a Ligchine machine to pour my floor - it was just under 60 m3 in one hit (the shed is 80x50 feet).
They are very good at what they do in fairness, but my god they made it look so easy, and the finish was perfect!
 
S

Stroppymonkey

Well-known member
I used a firm with a Ligchine machine to pour my floor - it was just under 60 m3 in one hit (the shed is 80x50 feet).
They are very good at what they do in fairness, but my god they made it look so easy, and the finish was perfect!
Is that a laser grader? One of our local outfits has one . I think I am going to do mine in 4 x 15ft bays with K-Forms. Given my day job of installing heating , and our constant production of usable waste fuel.. I plan to install UFH pipework onto/into the slab. Will needs joints for movement, and I can’t see a nice way of doing the whole floor at once.
Will ask advice once we get somewhere near the point of having to work it out. Years away yet.
 
M

Monkeybusiness

Well-known member
Is that a laser grader? One of our local outfits has one . I think I am going to do mine in 4 x 15ft bays with K-Forms. Given my day job of installing heating , and our constant production of usable waste fuel.. I plan to install UFH pipework onto/into the slab. Will needs joints for movement, and I can’t see a nice way of doing the whole floor at once.
Will ask advice once we get somewhere near the point of having to work it out. Years away yet.
Yeah, laser screeder. They cut joints in the following morning. The slab was laid with fibres in it, hasn’t moved at all.
 
Top