The 'Today's Job' thread

V8Druid

V8Druid

do it as well as you can,but learn to do it better
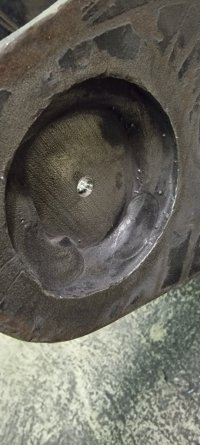
I'd cut the pins off internally. Mark the centres of them on the outside, then drill through with a 50mm mag drill. Insert 40mm pins, check and weld. Easy enough.
spot on other than drilling/broaching through with 40mm (typo Doob?) ... exactly what I would suggest too ... see no issues at all ... you have enough of the 60mm hole edge showing to be able to get an accurate centre mark in the cut off stub ends.
personally, once you have accurate centres marked, I would put a 4mm hole through the 60mm pin stubs, to centre the broach pin on, then build up the recessed hole flush, with weld, around its circumference, to get a face on the outer face of the cheeks at the 40 diameter, then broach it ... can then weld your new pins on the outer face of the cheeks, making them way easier to remove in future, instead of the welds being recessed into the cheek plates

 
V8Druid

V8Druid

do it as well as you can,but learn to do it better
Am i going to have to buy a fecking mag drill :(
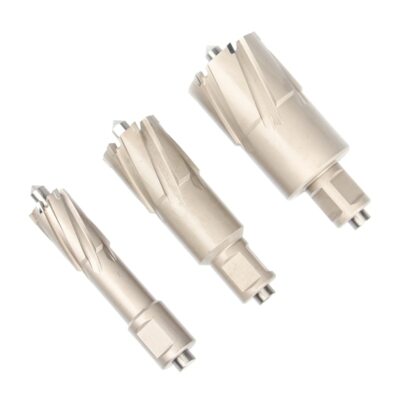
posted three real cheap ones in classifieds the other night ... probably gone by now though - were utter gifts ..... @TiltyShaun is likely closest to them .... still listed ... middle one or the one on the right are newer than the left one IMHDO - different gear selectors ... look to me like they'd do 100mm .. but a braoch would be twice the price ... TBH I'd buy all three and sell a couple on at 200 quid each ... free one and 100 quid profit

look to be rotating bases too

View attachment 54163

this one is still listed too


anyone near it ... ought to have come down in price a bit now
1702141514090.png
 
Furniss

Furniss

Well-known member
can't be beaten for big holes (or any size TBH) .. once you've had one, you'll wonder HTF you managed without ... and make your own pick up cheeks ;)
Stub end of pin is only about 6/7mm thick.... a cheap step drill bit will have to do the job then build round the 40mm pin.
I dont do it for fun this bodging, its a needs must job.
Ffs ive only used my plasma cutter twice :) if someone wants to bid me on it !
20231209_181402.jpg


20231209_181654.jpg
 

Attachments

  • 20231209_181402.jpg
    20231209_181402.jpg
    125.1 KB · Views: 80
V8Druid

V8Druid

do it as well as you can,but learn to do it better
you'd not want to be buying too many of these though, on a weekly basis ... have a permanent ebay search in for large broaches
Am i going to have to buy a fecking mag drill :(
WP_20191201_12_36_23_Pro.jpg
WP_20160326_13_35_56_Pro.jpg
WP_20160328_14_36_55_Pro.jpg

1702148407875.png
1702148434878.png
 
Last edited:
V8Druid

V8Druid

do it as well as you can,but learn to do it better
Stub end of pin is only about 6/7mm thick.... a cheap step drill bit will have to do the job then build round the 40mm pin.
I dont do it for fun this bodging, its a needs must job.
Ffs ive only used my plasma cutter twice :) if someone wants to bid me on it !
View attachment 54357

View attachment 54356
if you have a pillar drill you could use a broach arbor and drill with that .. or a 19mm chuck, but the arbor is way better - has two flat drive points to suit the broach's drive faces ....
if you're tempted to plasma them out, make a spacer template to get the pins parallel and square to the cheeks .. piece of 20/25mm MDF cut to suit the distance between the pins (260mm) x 201/241mm and set 'em up like that .. spacing and squareness are critical on the S type hitches
 
Furniss

Furniss

Well-known member
if you have a pillar drill you could use a broach arbor and drill with that .. or a 19mm chuck, but the arbor is way better - has two flat drive points to suit the broach's drive faces ....
if you're tempted to plasma them out, make a spacer template to get the pins parallel and square to the cheeks .. piece of 20/25mm MDF cut to suit the distance between the pins (260mm) x 201/241mm and set 'em up like that .. spacing and squareness are critical on the S type hitches
Better not be too critical if im fabbing it !
Whats up with that ?
Screenshot_20231209_190257_Chrome.jpg
 
jd6820

jd6820

Well-known member
Ah so the alternator is behind the fan rotor. Easy access via the panel on the side of the engine can be seen in the image labelled IMG1296. Don't mix up the wires when re-installing so maybe worth photographing and labelling if it isn't obvious. Is the battery warning light going out once running? I'm thinking that is the model that increases to full throttle everytime you move the joystick from neutral? Even when cold! Make me shudder, the bomag ad120s ran same engine and just used a hand throttle so could run it at idle or part rpm.
 
V8Druid

V8Druid

do it as well as you can,but learn to do it better
Better not be too critical if im fabbing it !
Whats up with that ?
View attachment 54361
they have a tendency to wander unless set up in a pillar drill and job piece firmly clamped ... could buy two 40mm broaches for the cost of that just about :rolleyes:

1702145645456.png


1702148508340.png


1702145751904.png


Last edited:
Vinpetrol

Vinpetrol

Well-known member
Plenty of room in the machine up there and works for me, once its set its a combination of sound and lights for finding grade, but for others who maybe get more out of it then i dunno 🤷‍♂️
It wasn’t meant as a criticism . Genuinely asking as I haven’t used mine yet and it occurred to me that that would be handy if I only need it for setting up then use the reader in front of me
 
JerryRtilt

JerryRtilt

Well-known member
It wasn’t meant as a criticism . Genuinely asking as I haven’t used mine yet and it occurred to me that that would be handy if I only need it for setting up then use the reader in front of me
I think its a bit of a personal preference thing, i've got in the habit of watching the figures on the screen more than the lights, which is why i went to so much trouble to set it up where it is, the light unit can be set up to be more or less accurate and volume adjusted also.
 
Vinpetrol

Vinpetrol

Well-known member
I think its a bit of a personal preference thing, i've got in the habit of watching the figures on the screen more than the lights, which is why i went to so much trouble to set it up where it is, the light unit can be set up to be more or less accurate and volume adjusted also.
I need to get using it and see how I’m working it .
Do you use yours more with a tripod laser or without ?
 
Furniss

Furniss

Well-known member
I need to get using it and see how I’m working it .
Do you use yours more with a tripod laser or without ?
@Gunners has some good videos on idig that are deff worth a look.
Personally it depends on the job as to whether I setup the laser, for little runs you can bench the bottom of trench as you go , but also can end up quite a ways out using that method, even trying to be careful.
For pads and larger areas then laser is the way to do it.
 
Left hooker

Left hooker

Well-known member
Christ all this talks of getting it drilled and all would have been quicker to just chalk line just below pins on both sides and cut and weld the bracket onto the top as getting all 4 holes square and correctly aligned to both sides and pin to pin would be a ball ache
 
JerryRtilt

JerryRtilt

Well-known member
I need to get using it and see how I’m working it .
Do you use yours more with a tripod laser or without ?
Depends on the job really, if reducing a level along side a curb line for example theirs no need to use a laser just reference off the curb, or just reducing a level roughly transfer from one point to another although very easy to accumulate error that way, probably use laser more, thinking about it.
 
Top