
Scraperman
Well-known member
Thank you. Very helpful.From memory the metal backing strips are about 0.8mm thick, but you could easily go much thicker if that's what you've got.
Your existing strips may be fine for reuse too.

Thank you. Very helpful.From memory the metal backing strips are about 0.8mm thick, but you could easily go much thicker if that's what you've got.
Your existing strips may be fine for reuse too.
With Without
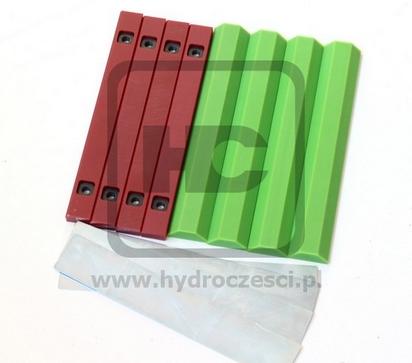
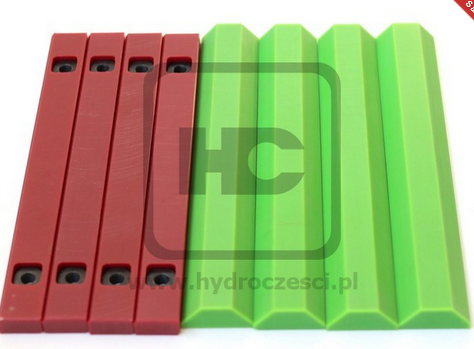
try dale hines at vicary plant they do lots of older jcb parts they have a fb page i think.Have ordered all the parts (hopefully) that I need for this job. I have been Googling for a free parts manual because I might renew some pins & bushes around the bottom of the dipper and linkage area but can't find anything. Does anyone have any suggestions please ?
Thanks for that. I have ordered the wear pads & backing metal plates from Vicary. I have bought stuff from them since Simon was in short trousers !.try dale hines at vicary plant they do lots of older jcb parts they have a fb page i think.

plenty on ebayHave ordered all the parts (hopefully) that I need for this job. I have been Googling for a free parts manual because I might renew some pins & bushes around the bottom of the dipper and linkage area but can't find anything. Does anyone have any suggestions please ?
Yes, I know, but I have a service manual and also a spares manual for all the diggers that I've ever owned but just fancy a spares book for the one I have now. I like to check part nos. before ordering.plenty on ebay

Yeah - I have a suggestion - don't bother.I have been Googling for a free parts manual because I might renew some pins & bushes around the bottom of the dipper and linkage area but can't find anything. Does anyone have any suggestions please ?
Thank you for that information. I just don't understand why that is the position though. It's crazy. We all have to buy spares at some time or other for all our machines. I have spares books for tractors, combines, balers, etc. all have the part nos. which I quote to a supplier and, if they are up to the job, can tell me in minutes if they are in stock. Thanks again Gecko but I find it utterly bizarre.Yeah - I have a suggestion - don't bother.
If I were any closer, you could have mine - it's very disappointing.
Yep! - so much more useful than the Parts Book.I was just playing with the dipper page and the part numbers appeared : This page. and every other page, is showing me part Nos.
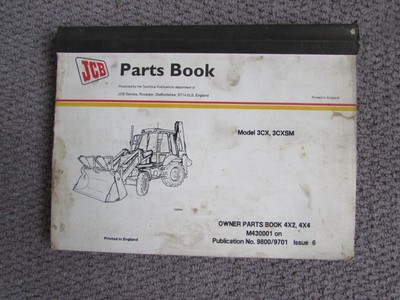
Thank you. That's useful. A bit more research to determine if it's the same model as mine is needed.There is a parts book on fleabay at the moment. (same as mine)
The exploded diagrams are great and help (you know what to expect before you get there), but they are the same drawing on the website.
@JCB 3CX 3CXSM Backhoe Loader Parts Book@ | eBay
JCB 3CX 3CXSM Backhoe Loader. Parts Book.www.ebay.co.uk
Just check your serial number: if it's between 430001 and 459999, its a matchThank you. That's useful. A bit more research to determine if it's the same model as mine is needed.
That's a shame. But thanks anyway.Just check your serial number: if it's between 430001 and 459999, its a match
(still doesn't mean you want it!)
Yes, that's the story of my life ! Thanks for the link though. Much appreciated.Oh.
My service manual covers SnNo's: 400000~460000, so there must be a fair amount of overlap.
It's the differences that'd catch you though.

I wouldn't say lazy way as getting the rod end pin of the extender out takes a lot of heat and in my case when had to renew rod as ram cap unscrewed had to use the 3t mini digger with pecker on to hammer it out due to lack of grease nipple on rod endO.K. Put the wear pads in today. I did it the lazy way, i.e. didn't take the extending dipper frame off, I just wangled the adjusting pads and the wear pads in by either pressing the end of the dipper on the ground to get the bottom adjustable pads in or by lifting it up for the top set and vice-versa for the stationary top pads. I am retired these days but if I'd had the guys around me who used to work for me I would have taken the whole lot to pieces as has been explained earlier in this topic.
I bought new adjusting pins that, because I am using the locknut method of keeping them tight (hopefully !) I bought them 1/4" longer than the originals. That is not quite going to be long enough because of the amount of thread being taken up by the half nut. It's O.K. for now, I have been able to adjust the pads to what they should be but for anyone who is going down the same route as I did, i.e. locknuts instead of washers , and whose machine(s) are doing a lot of work I would suggest 2" long at least. They are 3/4" UNF bolts.
I am going tostart a new thread because I still have a "clangy" bucket and new pins and bushes aren't going to solve the problem as I have found out after fitting the wear pads.
And finally, thanks to everybody who has contributed to this topic. You have all been very helpful.
Was the nipple damaged or never fitted?due to lack of grease nipple on rod end