The 'Today's Job' thread

Furniss

Furniss

Well-known member
V wet day in NW France !!
Dropped onto a little inside job to get us to the weekend :)


1000012866.jpg
1000012869.jpg
1000012875.jpg
1000012867.jpg
1000012883.jpg
 
doobin

doobin

Well-known member
Full overhaul on the landlords stock box. Never known hubs this bad. Cowshit gets to them. The circlips needed serious heat and half a can of penetrating oil per hub as I worked them around. Then 35 tons of press to free the bearings. Glad I went for the fifty ton model. The little 90 degree die grinder with a stripping pad was worth its weight in gold as usual to clean up the inside of the hubs. If you don’t have one in your workshop you’re wasting a lot of time!

Took me as long to change the all the hub bearings as it took Harry to do all the brakes and cables. What a bitch of a job.

IMG_3809.jpeg
IMG_3811.jpeg
 
Last edited:
Lancs Lad

Lancs Lad

Well-known member
Full overhaul on the landlords stock box. Never known hubs this bad. Cowshit gets to them. The circlips needed serious heat and half a can of penetrating oil per hub as I worked them around. Then 35 tons of press to free the bearings. Glad I went for the fifty ton model. The little 90 degree die grinder with a stripping pad was worth its weight in gold as usual to clean up the inside of the hubs. If you don’t have one in your workshop you’re wasting a lot of time!

Took me as long to change the all the hub bearings as it took Harry to do all the brakes and cables. What a bitch of a job.

View attachment 57490View attachment 57491
2nd that on the 90' grinder. Can't live without it. Use it for all sorts. With a Decent dormer die it eats stuff.
 
V8Druid

V8Druid

do it as well as you can,but learn to do it better
Full overhaul on the landlords stock box. Never known hubs this bad. Cowshit gets to them. The circlips needed serious heat and half a can of penetrating oil per hub as I worked them around. Then 35 tons of press to free the bearings. Glad I went for the fifty ton model. The little 90 degree die grinder with a stripping pad was worth its weight in gold as usual to clean up the inside of the hubs. If you don’t have one in your workshop you’re wasting a lot of time!

Took me as long to change the all the hub bearings as it took Harry to do all the brakes and cables. What a bitch of a job.

View attachment 57490View attachment 57491
unusual to see a dual race assembly in a trailer hub Doob .... explains the circlip
 
V8Druid

V8Druid

do it as well as you can,but learn to do it better
I don’t think the circlip does anything other than stop the hub moving back towards the backplate. The bearing is held onto the stub by a large nut which is then peened to hold it in place.
and the circlip retains the dual bearing assembly in place in its housing .. as said to " stop the hub moving back towards the backplate " .. the large nut on the stub holds the bearing's inner assembly (with factory set adjustment) together, but sadly with this set up there is zero adjustment at any later stage :cry: ..........👇👇
Unfortunately......much prefer the old fashioned adjustable tapered roller bearings 🙂
which is why 👇👇👇 .......
They sure seemed to last longer!
they could be adjusted as they wore :giggle::cool:(y)

pretty crap and retrograde step really ....... but ensures the dorks of today, who couldn't adjust a wheel bearing to save their lives, 🥺 simply have to fit a new assembly, in one piece and have it right from the off 🤬🤬
same thing applies to most cars/vehicles today, sadly

and makes the bearing manufacturers mucho dinero on a way more regular basis
 
V8Druid

V8Druid

do it as well as you can,but learn to do it better
Found time this pm to attend to this dog for a customer. The very definition of ‘nothing left to weld to’View attachment 57494View attachment 57495View attachment 57496
I hope you're charging like Mog's proverbial 'wounded rhino' for that ...... totally sh1t job to do
'In the day' (with a workshop full of the appropriate kit) I'd have cut it out, formed a Z and replaced it completely .... without a folder or press brake, over skinning is the only realistic option
 
William127

William127

Well-known member
Full overhaul on the landlords stock box. Never known hubs this bad. Cowshit gets to them. The circlips needed serious heat and half a can of penetrating oil per hub as I worked them around. Then 35 tons of press to free the bearings. Glad I went for the fifty ton model. The little 90 degree die grinder with a stripping pad was worth its weight in gold as usual to clean up the inside of the hubs. If you don’t have one in your workshop you’re wasting a lot of time!

Took me as long to change the all the hub bearings as it took Harry to do all the brakes and cables. What a bitch of a job.
Must be the day for it, knocked out the bearings from all 4 hubs from my LM146 ready for new. No press here, just some old sockets, ground down races and a well applied club hammer. As always the second one came out in half the time of the first once you're in your stride 👍
They were all in pretty decent condition for a 10 year old trailer that's done unknowable thousands of miles and tons of load, but it's getting 'the works' cables, shoes, expanders, lights, floor, suspension checking over ready for another 10 years. Such a versatile trailer, I nearly stuck it in an auction last year but decided to sort it right out instead.

I'm going to look for a press though, 50 ton it is 😆 👍
 
A

AHPP

Well-known member
Must be the day for it, knocked out the bearings from all 4 hubs from my LM146 ready for new. No press here, just some old sockets, ground down races and a well applied club hammer. As always the second one came out in half the time of the first once you're in your stride 👍
They were all in pretty decent condition for a 10 year old trailer that's done unknowable thousands of miles and tons of load, but it's getting 'the works' cables, shoes, expanders, lights, floor, suspension checking over ready for another 10 years. Such a versatile trailer, I nearly stuck it in an auction last year but decided to sort it right out instead.

I'm going to look for a press though, 50 ton it is 😆 👍

I did bearings on the van the other week. Battered one out with a big socket and a big hammer just to see what it was all about. Took the other to someone with a press. Much more civilised.
 
Giles

Giles

Well-known member
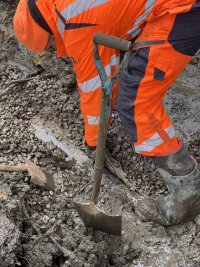
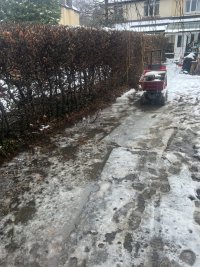
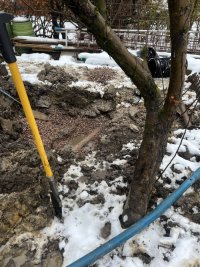
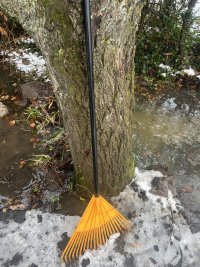
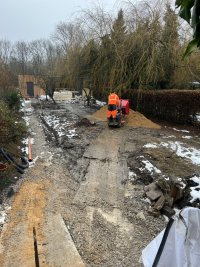
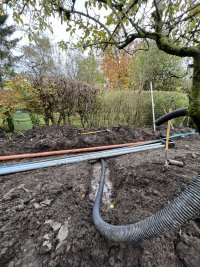
Lost a full morning yesterday putting right a drain we installed in November to drain my pond which is still taking water frim
Neighbours.

I was finishing some paperwork or something and laddo sleeved the pipe in Geotextile. We used to do this and sleeve was in land drains fittings bag, but I’d stopped doing it because of problems anyway it went in sleeved.

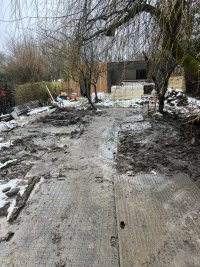
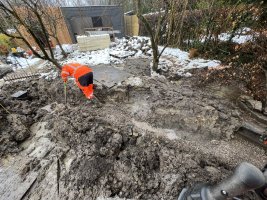
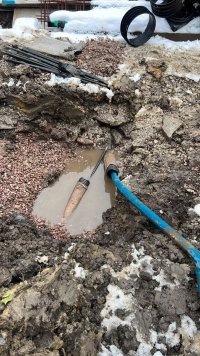
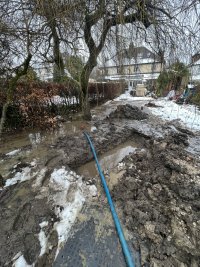
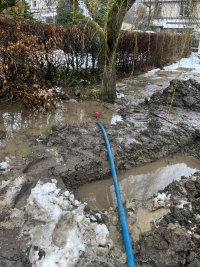
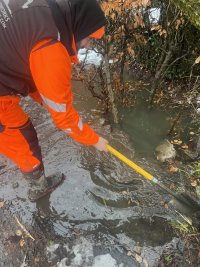
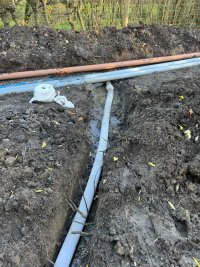
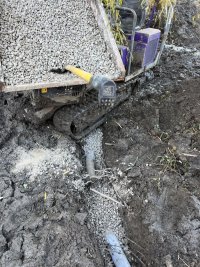
Yesterday morning pond was 10x size where I’ve lifted lawn level and flooded it dug down found drain in 2 spots not flowing cut it where it joint lateral and rodded and fine till it hit knotted sock at end.

Other area dug and exposed water not soaking in to pipe but following stone bed.

Cut Geotextile sock at end and away she went

Exposed drain and cut sock off

Ground is heavy clay not sandy

Do not wrap drains in Geotextile
 

Attachments

  • 1ACC9A7A-59A8-4D1B-8534-1F4795C4451B.jpeg
    1ACC9A7A-59A8-4D1B-8534-1F4795C4451B.jpeg
    333.3 KB · Views: 127
  • 74771F53-C17F-4FEA-944A-C5A89982A977.jpeg
    74771F53-C17F-4FEA-944A-C5A89982A977.jpeg
    360.4 KB · Views: 136
  • 30D83592-D28D-41F2-AE2A-C501593BB042.jpeg
    30D83592-D28D-41F2-AE2A-C501593BB042.jpeg
    455.4 KB · Views: 131
  • 823D96EA-9523-4721-94B8-D86F9DA60BAC.jpeg
    823D96EA-9523-4721-94B8-D86F9DA60BAC.jpeg
    485.2 KB · Views: 124
  • 99EA3F13-DA10-4521-B12A-0A1D5FB293CE.jpeg
    99EA3F13-DA10-4521-B12A-0A1D5FB293CE.jpeg
    265.7 KB · Views: 127
  • 451B9EF1-85F0-469E-A8FF-6DFFDD8050C0.jpeg
    451B9EF1-85F0-469E-A8FF-6DFFDD8050C0.jpeg
    361.7 KB · Views: 126
  • 72515D34-1F90-4323-9226-0355B1E8B204.jpeg
    72515D34-1F90-4323-9226-0355B1E8B204.jpeg
    337.3 KB · Views: 104
  • CE82A640-E299-4EAC-A9EE-835C537AA47B.jpeg
    CE82A640-E299-4EAC-A9EE-835C537AA47B.jpeg
    344.8 KB · Views: 120
  • D0E3D150-810C-4BDE-9E87-95F3292AF62A.jpeg
    D0E3D150-810C-4BDE-9E87-95F3292AF62A.jpeg
    460.6 KB · Views: 104
  • 8F33B038-9F14-4A89-9D60-E4D66718E440.jpeg
    8F33B038-9F14-4A89-9D60-E4D66718E440.jpeg
    417.8 KB · Views: 121
  • CDA556F7-D710-4D45-9478-E09E882608A8.jpeg
    CDA556F7-D710-4D45-9478-E09E882608A8.jpeg
    373.7 KB · Views: 120
  • 7FD0273C-D8C5-400B-8758-6E72E18D7382.jpeg
    7FD0273C-D8C5-400B-8758-6E72E18D7382.jpeg
    390 KB · Views: 121
  • A17C10C5-5EDF-4FB5-A492-C2D677940515.jpeg
    A17C10C5-5EDF-4FB5-A492-C2D677940515.jpeg
    315.7 KB · Views: 120
Giles

Giles

Well-known member
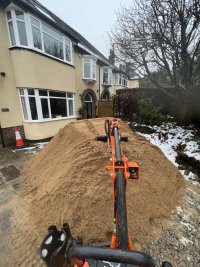
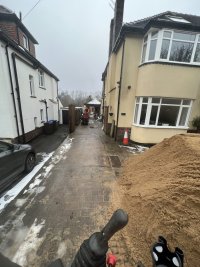
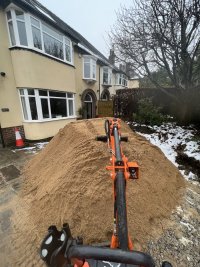
Then had 16 ton of sand to get shifted in the rain all day slow going

Video is bottom land drain once Geotextile cut and top water with 2” pump into it


Attachments

  • DB8A4E46-5E6A-481C-B85E-4509949511DB.jpeg
    DB8A4E46-5E6A-481C-B85E-4509949511DB.jpeg
    429 KB · Views: 112
  • 3948B920-0733-4267-99E1-2416E5B97974.jpeg
    3948B920-0733-4267-99E1-2416E5B97974.jpeg
    257.3 KB · Views: 84
  • 208E27E4-C9CB-4696-B59F-13B2B33B3DE7.jpeg
    208E27E4-C9CB-4696-B59F-13B2B33B3DE7.jpeg
    360.4 KB · Views: 96
  • 645FC070-6D73-447A-BC56-35F1074B4BE5.jpeg
    645FC070-6D73-447A-BC56-35F1074B4BE5.jpeg
    440.9 KB · Views: 109
  • 00B61E59-30CA-44CF-B0E9-E55A6F94B5F6.jpeg
    00B61E59-30CA-44CF-B0E9-E55A6F94B5F6.jpeg
    477.8 KB · Views: 105
  • E250D508-6FC6-49D4-8E9F-EB7CFE27C649.jpeg
    E250D508-6FC6-49D4-8E9F-EB7CFE27C649.jpeg
    211.6 KB · Views: 99
  • 0F54A95F-4455-4BC9-A115-48B26F98FB94.jpeg
    0F54A95F-4455-4BC9-A115-48B26F98FB94.jpeg
    412 KB · Views: 98
6

6feetdown

Well-known member
👍 we are frequently asked by customers who have been on google if we should wrap it and we dont.
We've stopped a while back too.
Only thing I'm torn with is fabric in whole of trench or just placed on top of stone
 
Top