Druidfab Variable Angle Rotator (VA-r) .. a bit of a project

Mick-the-fitter

Mick-the-fitter

It’s what I do!
well initially Mick I was too rough to do much more than sit about and try to recover ..
went from 13.5 stone to under ten in ten days ..
looked like a Biafran for months so didn't really feel up to much. Plus I was back and fore having testing done and then fighting to get treated ....
kept me focused for a while. Also did lots about the place as I started to feel more like I should.
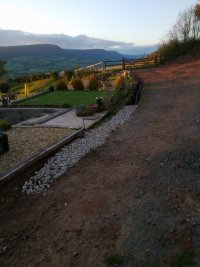
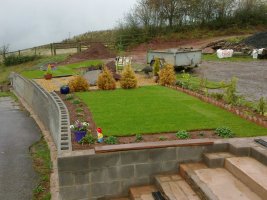
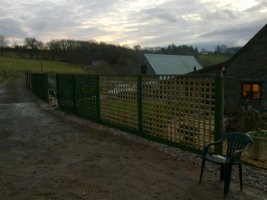
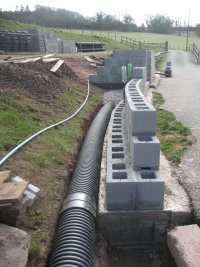
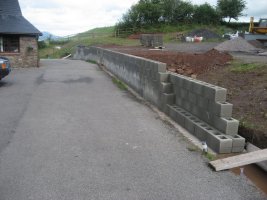
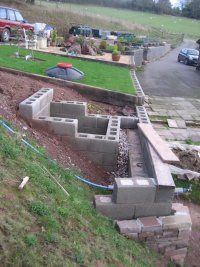
New drainage - JakieB kept me sane - dug, then laid the foundations for and built an 80+m retaining wall in twin skin 9" hollows, down the side of the drive - very slowly - a block was about all I could manage to lift. lots of landscaping, etc.
Also had to start clearing and selling my workshop and equipment - spent a lot of time canvassing dealers I used to do biz with, trying to drum up interest.
Did miss it all though
So would I miss it, all I’ve ever done (plant fitting)
 
V8Druid

V8Druid

do it as well as you can,but learn to do it better
slept well most nights after days on this lot .... kept me mind on other things @Mick-the-fitter
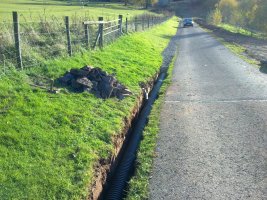
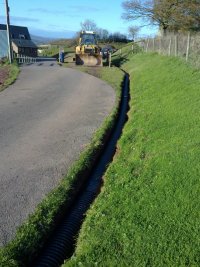
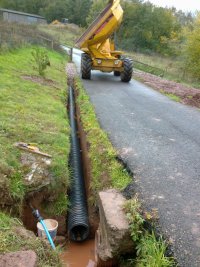
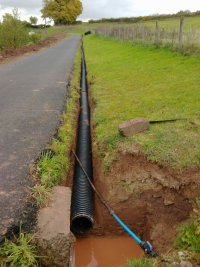
first and second pic .. rock right in the trench line - took some breaking out ...
first pic the telephone line that was supposed to be the other side of the drive according to Openreach and 4" below the surface :mad:
the drain captures all the run off, off the field
10-11-10 (1).jpg Picture 009.jpg 10-11-10 (5).jpg 28-10-10.jpg28-10-10 (2).jpg 16-10-11 (2).jpg 16-10-11 (1).jpg 13-10-11.jpg 10-12-11 (1).jpg IMG_2958.jpg IMG_2970.jpg IMG_3093.jpg IMG_3105.jpg IMG_3244.jpg
 
Last edited:
V8Druid

V8Druid

do it as well as you can,but learn to do it better
kids have gone early ... Clara off to a school play ... so ...... to continue ...
pinion and spigot back in and packed
WP_20150228_13_39_21_Pro.jpg

clean worm and crown ready to get popped in next
WP_20150228_13_43_00_Pro.jpg

pinion copiously greased
WP_20150228_13_47_39_Pro.jpg

to go back in its clean bearing race
WP_20150228_13_47_50_Pro.jpg

then the housing got well and truly stuffed
then made a serious error and put the crown wheel in the wrong way up :mad:
WP_20150228_14_38_26_Pro.jpg

the two tapped holes for extracting it are on the underside so called upon the services of two expanding body bolts in those two plain holes and fortunately they pulled it back off so I could.....
put it back in the right way up :giggle:
WP_20150228_14_59_08_Pro.jpg
fit the outer bearing and pack it all
WP_20150228_16_21_20_Pro.jpg

also installed a grease nipple in a blanking plug in the wall of the crown wheel housing and made sure this blanking plug would co-operate for the periodic installation of a grease nipple in the worm's housing ... didn't want to leave one in there as a very vulnerable position for a nipple ... just screw one in as and when required .... and pumped a load more gresae in its tube
WP_20150228_16_21_33_Pro.jpg


then whilst it was all accessible and in bits created a grease wall to keep grease in the slew ring/pinion run way
WP_20150302_14_22_35_Pro.jpg


not bad for a free hand circle over the bench edge/anvil beak .... and installed ....
WP_20150302_16_00_06_Pro.jpg

less than a mil clearance between its edge and the lower plate.....
WP_20150302_16_27_46_Pro.jpg

gave everything a good dose of grease and dropped the top (bottom) back on
WP_20150302_16_52_31_Pro.jpg

forgot to put a couple of tapped holes in the plate for a couple of nipples to pump more grease in there, so must've pulled it off again and got them sorted, together with the aux outlet holes
WP_20150306_18_06_03_Pro.jpg

and fitted some bulkhead adaptors, stepped elbows and FF QCs ready for the feed hoses
WP_20150306_18_06_31_Pro.jpg


have since changed the nipples for flat type ... less vulnerable
 
Last edited:
V8Druid

V8Druid

do it as well as you can,but learn to do it better
Water level ...? 😆😆😆😆Who you steal that off? Noah?
here you go -- you're obviously jealous of this low tech bit of kit and want one :ROFLMAO::ROFLMAO: .. no more flat batteries and POP to set up (y):giggle::cool:
 
D

Diggerdavey

Well-known member
kids have gone early ... Clara off to a school play ... so ...... to continue ...
pinion and spigot back in and packed
View attachment 54759
clean worm and crown ready to get popped in next
View attachment 54760
pinion copiously greased
View attachment 54761
to go back in its clean bearing race
View attachment 54762
then the housing got well and truly stuffed
then made a serious error and put the crown wheel in the wrong way up :mad:
View attachment 54763
the two tapped holes for extracting it are on the underside so called upon the services of two expanding body bolts in those two plain holes and fortunately they pulled it back off so I could.....
put it back in the right way up :giggle:
View attachment 54764 fit the outer bearing and pack it all View attachment 54765
also installed a grease nipple in a blanking plug in the wall of the crown wheel housing and made sure this blanking plug would co-operate for the periodic installation of a grease nipple in the worm's housing ... didn't want to leave one in there as a very vulnerable position for a nipple ... just screw one in as and when required .... and pumped a load more gresae in its tube
View attachment 54766

then whilst it was all accessible and in bits created a grease wall to keep grease in the slew ring/pinion run way
View attachment 54767

not bad for a free hand circle over the bench edge/anvil beak .... and installed ....
View attachment 54768
less than a mil clearance between its edge and the lower plate.....
View attachment 54769
gave everything a good dose of grease and dropped the top (bottom) back on
View attachment 54770
forgot to put a couple of tapped holes in the plate for a couple of nipples to pump more grease in there, so must've pulled it off again and got them sorted, together with the aux outlet holes
View attachment 54774
and fitted some bulkhead adaptors, stepped elbows and FF QCs ready for the feed hoses View attachment 54775

have since changed the nipples for flat type ... less vulnerable

Fair play to you for admitting the crown wheel error. No one would ever have known. Mark of the man who admits his own mistakes imho. Great thread. Very impressed with creating your own tilt rotator
 
V8Druid

V8Druid

do it as well as you can,but learn to do it better
back the right way up then ....
WP_20150307_13_14_19_Pro.jpg

couple of bits of braided fuel hose as cushions for the rotary couplings drive bolts
WP_20150307_13_40_55_Pro.jpg
WP_20150307_13_43_12_Pro.jpg

new bolts for the drives and the lower half fixings ... rotary ready to go in ... siliconed a thin plastic cover on the top of the rotary ..... keep the weather off it
WP_20150307_13_44_21_Pro.jpg

and in it went ... drives lock nutted to the body

WP_20150307_13_56_21_Pro.jpg


popped the lid back on the crown wheel housing with the loom attached
WP_20150307_14_49_50_Pro.jpg
and dropped the hyd. manifold back in
WP_20150307_15_12_06_Pro.jpg

WP_20150307_16_50_41_Pro.jpg
plumbed the P & T lines for orientation, for later and the tilt feed lines are easier with out the top half in the way
WP_20150307_17_10_49_Pro.jpg

getting tighter in there

WP_20150308_15_27_17_Pro.jpg


was now going to need some more flexi rubbery bits ..... so back in the trailer for a n other trip to the lads in Fast Fluid ...
WP_20150313_15_41_55_Pro.jpg

no good trying to size these up with gash hoses
WP_20150313_15_49_07_Pro.jpg
tight spot to get 'em into and get right
WP_20150313_15_49_13_Pro.jpg

back again and out onto the bench
WP_20150313_15_51_32_Pro.jpg
 
V8Druid

V8Druid

do it as well as you can,but learn to do it better
Fair play to you for admitting the crown wheel error. No one would ever have known. Mark of the man who admits his own mistakes imho. Great thread. Very impressed with creating your own tilt rotator
cheers Davey .. you're right, but "the man who's never made a mistake has never done anything " as they say and made a few in me time :rolleyes: :giggle: .. rectifying them or getting round them is all part of the challenge too ;)
 
V8Druid

V8Druid

do it as well as you can,but learn to do it better
on the bench
WP_20150313_15_54_03_Pro.jpg

and popped these on .... had 'gash fitted' these
WP_20150313_15_57_35_Pro.jpg


WP_20150313_15_57_46_Pro.jpg

grabbed the top half ......

WP_20150317_16_09_37_Pro.jpg


and pinned it back on

WP_20150317_16_58_44_Pro.jpg


picked it up and tilted it to one side (with a large bar) to assist in accessing the guts/plumbing
WP_20150317_17_30_13_Pro.jpg

and attached the feed hoses for the tilt ram Tees

WP_20150317_17_30_20_Pro.jpg


WP_20150317_17_45_51_Pro.jpg
and decided that sticking with the 3/8" rubber was not gonna work well and needed to be shorter (marks on hoses), so had some fresh ones made up in 1/4" ... had reducers on the tees anyway as the tilt ram hoses were/are 1/4" as were the tees ... the 3/8 were so stiff I ran the risk of them slacking themselves off on the tees
fresh rubber acquired ...
WP_20150319_16_52_33_Pro.jpg

with a 3/8th fitting one end for the manifold's adapters ..... have since made use of bot the 3/8th hoses ... one on me fork mast base supply line, long time ago and one on little Jake's 6x2 diverter this year for the Haner's installation:giggle::giggle:
much better, tidier and more flexible fit - still has the inline rotary unions in place on the manifold to let them swivel with the lower as it tilts
WP_20150319_17_04_27_Pro.jpg
WP_20150319_17_04_18_Pro.jpg
then ... fitted a few temporary lines
WP_20150319_17_36_13_Pro.jpg


for a wet trial :giggle::giggle:
 
V8Druid

V8Druid

do it as well as you can,but learn to do it better
I don't think that anyone has ever seen this before ... just uploaded it to 'the tube' ... IIRC it is in my Photobucket, but don't know as it's ever been viewed/played -- terrible playback for vid.s on 'bucket


edit
forgot to say that it will multi function but I needed one hand to hold the phone, so each motion got operated separately whilst I swapped hands to hold it :rolleyes::giggle::giggle:
 
Last edited:
M

Monkeybusiness

Well-known member
I don't think that anyone has ever seen this before ... just uploaded it to 'the tube' ... IIRC it is in my Photobucket, but don't know as it's ever been viewed/played -- terrible playback for vid.s on 'bucket
It must have been a great feeling seeing it ‘alive’ for the first time - incredible planning and execution sir!
 
V8Druid

V8Druid

do it as well as you can,but learn to do it better
It must have been a great feeling seeing it ‘alive’ for the first time - incredible planning and execution sir!
grin factor eleven'd probably be a good description :giggle::giggle: :giggle: .. or elation ...

few more things to be said about the vid ... was being 'oiled' very tentatively by my left foot .. will rotate a lot quicker, same with the tilt ... plus I had 700mm of travel on those rams (unfettered) I only needed IIRC circa 600-ish .. going too far would have been disastrous so again great care taken not to over cook things ... you'll see how I got round that shortly ;):)

but yeh was mega-chuffed it worked first try ...... and no leaks (y):cool:
may not be the prettiest, but does all it's supposed to - and a bit more - 'bout 15 degs either way :giggle::giggle:
 
Last edited:
V8Druid

V8Druid

do it as well as you can,but learn to do it better
so .... it worked ... now to finesse it a bit more :giggle:
I had more ram travel than I needed or could live with so had to create some stops to prevent it destroying itself by over stroking ..... as Mog said at the time, having seen my slightly Heath remedy ... should have stripped the cylinders and put some travel stops in the bottoms of the cylinders, but had no lathe at the time and nothing really suitable to create them with .. but I did have this :rolleyes:

WP_20150320_14_17_31_Pro.jpg


and a little cunning
WP_20150320_14_37_10_Pro.jpg
WP_20150320_14_48_25_Pro.jpg

WP_20150320_14_53_08_Pro.jpg
WP_20150320_15_22_55_Pro.jpg

and now I a, gonna have to find the pix to show you what I did with 'em .....
in the meantime this obviously got done then too
spiral wrapped my loom as really didn't want any disasters befalling the MkIII loom :giggle:
WP_20150325_15_16_15_Pro.jpg


WP_20150325_15_16_22_Pro.jpg
WP_20150325_15_16_35_Pro.jpg
WP_20150325_15_16_42_Pro.jpg
WP_20150325_15_17_17_Pro.jpg
and a sleeve over the main control lead
WP_20150325_15_17_29_Pro.jpg

wouldn't want anything disastrous happening to that either ... all these leads were pretty crammed into a space that was going to get a lot tighter as things progressed

next up.. according to the piicy's date stamps were the tilt ram hoses ... got them secured .... you saw the clips arrive a while back
WP_20150325_16_53_41_Pro.jpg

stainless pipe clamps bolted down, followed by stainless ties with a self setting ball grip system ... would be a bitch to get back off, but wanted them to stay put -- which they have
WP_20150325_17_23_49_Pro.jpg
WP_20150325_17_24_01_Pro.jpg
 
V8Druid

V8Druid

do it as well as you can,but learn to do it better
Mog's ring idea to pass my feed/return hoses through .. have to admit I've never tried to get the multiplug through one - just use a carabiner to keep the control lead out of harm's way .. would have to 'wangled' and don't think it'd (a) go and (b) be worth risking damaging the cable where it enters the plug .. it works as is

WP_20150325_18_06_35_Pro.jpg

belt and braces on the spiral wrap front ... went for it to provide max protection
WP_20150326_14_16_42_Pro.jpg
WP_20150326_14_17_06_Pro.jpg
WP_20150326_14_17_19_Pro.jpg

and wrapped one of the tilt tee hoses where it's in close proximity to a wear point at the base against the rotate motor's hoses
WP_20150326_14_27_38_Pro.jpg
end of April '15 we had one hell of a wild day - and even worse night
WP_20150329_13_20_37_Pro.jpg

.. as this was no longer welded to the metre square plate I'd used to keep it stable, I strapped it to the bench ... would've cried if it'd gotten blown over in the night and it had a very small footprint to sit on ... so couple of days later I made this
WP_20150405_14_29_36_Pro.jpg

WP_20150405_14_53_48_Pro.jpg
WP_20150406_14_06_19_Pro.jpg


rather than tie up a couple of 70 mil pins, I had quite a few 65mm pins sat about, so utilised a couple of them .... and it made it easier to line up without being too fussy/accurate
WP_20150406_14_45_31_Pro.jpg

WP_20150406_14_45_47_Pro.jpg

the 70s fitted and aligned ok - these were just a lot easier ;):giggle:(y)

remember these?
WP_20150508_14_20_42_Pro.jpg

it'd been a very dry month so had been busy on other things, including digging a lot of spoil out of my bank, so the VA-r'd been on the back burner .. but looks like I'd been rained off (slightest rain here and the ground turns to shite ) :( so got these out
WP_20150508_15_53_14_Pro.jpg
WP_20150508_16_57_18_Pro.jpg

I'd made a coupe of these previously - but wasn't happy with the way they'd turned out - holed them, before splitting them and made the hole way too tight for the job, so'd binned them off and gone again :rolleyes: .. these were as intended (y)

and that is it for tonight ;):)
 
T

Tintan28

Well-known member
I don't think that anyone has ever seen this before ... just uploaded it to 'the tube' ... IIRC it is in my Photobucket, but don't know as it's ever been viewed/played -- terrible playback for vid.s on 'bucket


edit
forgot to say that it will multi function but I needed one hand to hold the phone, so each motion got operated separately whilst I swapped hands to hold it :rolleyes::giggle::giggle:
Absolutely dumbfounded, an amazing bit of individual design & fabrication!! 👏🏻👏🏻👏🏻
 
V8Druid

V8Druid

do it as well as you can,but learn to do it better
bit of a trial on a gash ram rod I used to use in the lathe for rolling rings out of round bar ..
WP_20150508_17_24_31_Pro.jpg


then prep the VA-r rams to take the spacers which literally simply sit on the rods .. the curtain placcy and ties stop it riding up/flopping/sliding about

WP_20150509_16_34_47_Pro.jpg


tow halves separated and ready to install
WP_20150509_16_35_06_Pro.jpg
and clamped in position
WP_20150509_16_48_18_Pro.jpg
.... rod with some tape around it ..keep any spatter off it and helped by

WP_20150509_16_49_12_Pro.jpg
half of a rejected collar
WP_20150509_17_21_02_Pro.jpg
and welded:giggle:

the pair in place and fixed
WP_20150509_17_45_54_Pro.jpg

and a coat of Firwood's finest ......... you all know what the colour is by now :ROFLMAO:
WP_20150509_19_33_32_Pro.jpg


next on the agenda was keeping the tish out of the guts .... couple of templates required
WP_20150510_15_22_35_Pro.jpg


WP_20150510_15_23_02_Pro.jpg


transfered to polycarb sheet and went and used my old metre hand folder that Richard (ex employee) bought off me when he set up on his own ...
WP_20150515_13_45_29_Pro.jpg

then some half inch nylon for gap filling
WP_20150516_19_37_17_Pro.jpg


WP_20150516_19_37_35_Pro.jpg

WP_20150516_19_38_12_Pro.jpg
 
V8Druid

V8Druid

do it as well as you can,but learn to do it better
WP_20150516_19_38_20_Pro.jpg
WP_20150516_21_00_38_Pro.jpg
WP_20150527_17_19_07_Pro.jpg

shot here of the spacers doing their job on max tilt either way
WP_20150527_16_07_11_Pro.jpg
WP_20150527_16_10_20_Pro.jpg

you'll notice I'd changed the Aux. QC's set up ... much easier to make a connection that way
and full tilt left/right - with no danger of wrecking anything, over-stroking
WP_20150527_16_10_42_Pro.jpg
...
WP_20150527_16_07_43_Pro.jpg


'digging weather' followed on from here and a couple of other 'projects/fab jobs' got time devoted to them at the end of May '15, according to the pix files ..... was weighing one of them when I obviously put the VA-r on the scales at the same time ...... dead on 500kgs
WP_20150622_14_11_55_Pro 2.JPG
this was the other item weighed
WP_20150622_14_02_10_Pro.jpg

my dipper mounted fork mast :giggle::giggle:
looks like I got myself some dedicated hoses made up for it at the end of June ... together with some plumbing for the other projects too
WP_20150625_18_12_59_Pro.jpg


T line, still on ISO A,s there .. now on FFs each end having changed the screw ISO A,s on the dipper and the ISO A,s on the VA-r .... hose rings in all their glory :giggle:and did make another set to go on the dipper just after the QC,s
WP_20150625_19_15_56_Pro.jpg
WP_20150625_19_16_23_Pro.jpg

and P line with control lead
WP_20150625_20_56_23_Pro.jpg
and for those who've not seen the mast:giggle:
WP_20150704_14_09_43_Pro.jpg

no tree was safe after that got created .. :giggle::giggle::LOL:
 
Last edited:
V8Druid

V8Druid

do it as well as you can,but learn to do it better
How on earth do you ever find anyone brave enough to go up in the tree slayer ? 😄
my BIL's been up in it .. took an oak down from the top down ... says it's fine .. better than any cherry picker he's ever been up in ... like standing on solid ground .... I haven't found anyone to op. the 'Drema to give it a try :rolleyes:
think I'd rather that than a man basket on a crane .. they do bounce about :giggle:
 
Top